


No products in the cart.
NEWS
Mastering the Art of Growing Delicious Tomatoes at Home
There’s a unique satisfaction that comes from biting into a sun-warmed, juicy tomato you’ve grown yourself. While these beloved fruits (yes, botanically they’re fruits!) are a staple of summer gardens, learning how to grow tomatoes successfully can sometimes feel like a mystery. They have specific needs, and meeting them is key to a bountiful harvest. Whether you’re a seasoned gardener or just starting out, understanding the basics can make all the difference between a sparse yield and baskets overflowing with crimson, vine-ripened goodness. This guide will walk you through the essential steps, from selecting your plants to picking the ripe fruit, ensuring your tomato growing journey is rewarding.
Starting Your Tomato Journey: Seeds or Seedlings?
Your first step in growing tomatoes is deciding whether to begin with seeds or purchase young plants (seedlings) from a nursery. Both methods can lead to a successful harvest, but starting from seed offers a wider variety of choices and a deeper connection to the growing process.
Starting from Seed
For those who enjoy nurturing plants from their earliest stage, starting tomato seeds indoors is a great option. Plan to sow your seeds about 6 to 8 weeks before the last expected frost date in your area. Use small pots or germination trays filled with a sterile seed-starting mix. Plant seeds about 1/4 inch deep (roughly three times the seed’s width) and keep the soil consistently moist, but not waterlogged. A temperature range of 70-80°F (21-27°C) is ideal for germination. Placing trays on a heat mat can help maintain this temperature. Once sprouts appear, move them to a sunny window or under grow lights. Ensure they receive plenty of light to prevent them from becoming “leggy” – tall and spindly – as they stretch towards a light source. Water at the base of the plants to keep leaves dry and reduce disease risk.
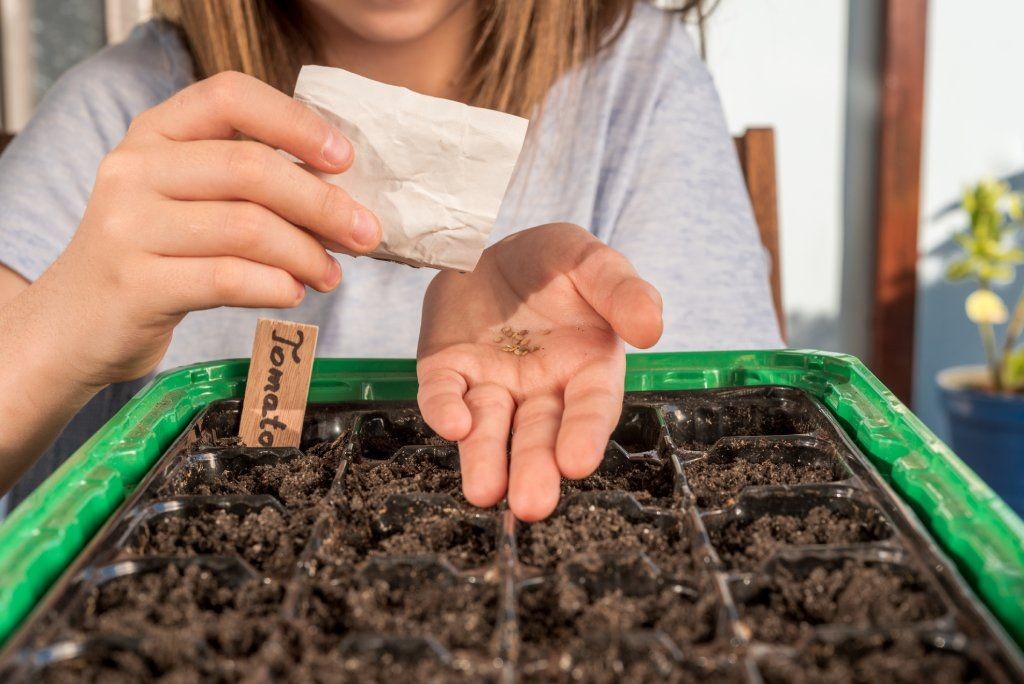 Gardener planting tomato seeds in a tray, preparing for indoor germination
Buying Seedlings
If starting from seed seems daunting or you’re simply short on time or space, purchasing healthy seedlings from a local garden center in the spring is a perfectly viable alternative. Look for sturdy plants with dark green leaves and no signs of yellowing or spotting. They should be compact, not leggy.
Regardless of how you start, your young tomato plants will need to be “hardened off” – gradually acclimated to outdoor conditions – before permanent transplanting. This involves exposing them to increasing periods of sunlight, wind, and cooler temperatures over a week or two.
Choosing the Right Variety
With thousands of tomato varieties available, selecting the right one can feel overwhelming. Consider your climate, available space, and how you plan to use the tomatoes. Look for varieties recommended for your region, often found at local nurseries. Seed packets and plant tags provide crucial information, including the plant’s type (determinate or indeterminate), maturity time, and disease resistance.
Understanding Tomato Types: Determinate vs. Indeterminate
When choosing tomato plants, you’ll encounter the terms “determinate” and “indeterminate.” Understanding this distinction is vital for planning your garden space and support systems.
Determinate Tomatoes
Determinate tomato plants are often called “bush” tomatoes. They grow to a specific height, typically around 3-4 feet (90-120 cm), and produce most of their fruit within a concentrated period. They stop producing new shoots and flowers once fruit has set at the tips of the branches. Their compact nature makes them excellent candidates for container gardening and they generally require less support than indeterminate varieties, often doing well with a simple tomato cage.
Indeterminate Tomatoes
Indeterminate tomatoes are often referred to as “vining” tomatoes. They will continue to grow, flower, and produce fruit throughout the entire growing season until cold weather arrives. These plants can become quite large, often reaching 6-10 feet (1.8-3 m) or more. Their vigorous, trailing growth habit means they absolutely require strong support, such as tall stakes, trellises, or large cages, to keep the heavy vines and fruit off the ground. Examples include many cherry and beefsteak varieties.
Knowing the type you are growing will help you determine the appropriate support structure and spacing needed well before planting time.
Planting Your Tomato Plants
Getting your tomato plants into the ground or their final container correctly sets the stage for healthy growth.
When and Where to Plant
Tomatoes are warm-weather lovers. Wait until the danger of the last frost has completely passed in your area and night temperatures consistently remain above 50°F (10°C) before transplanting seedlings outdoors. The soil temperature should ideally be around 55-60°F (13-16°C) or warmer. Cold soil can stunt growth and make plants more susceptible to disease.
Choose a planting location that receives at least 6-8 hours of direct sunlight per day. Tomatoes thrive in full sun; more light generally equals more fruit production. Ensure the chosen spot has well-draining soil.
Preparing the Site
Tomatoes prefer slightly acidic soil with a pH between 6.2 and 6.8. A simple soil test can confirm your pH level. If your soil is outside this range, amendments can help. Good drainage is crucial to prevent root rot. If you have heavy clay soil, incorporate organic matter like compost to improve structure and drainage. Experienced gardeners often recommend mixing in a balanced fertilizer (like a 10-10-10 blend) or plenty of compost a week or two before planting to give plants a good start.
How to Plant
When transplanting seedlings, dig a hole deep enough to bury a significant portion of the stem. Tomatoes are unique in that they can grow new roots along the buried stem, creating a stronger root system. You can plant them up to the bottom set of leaves.
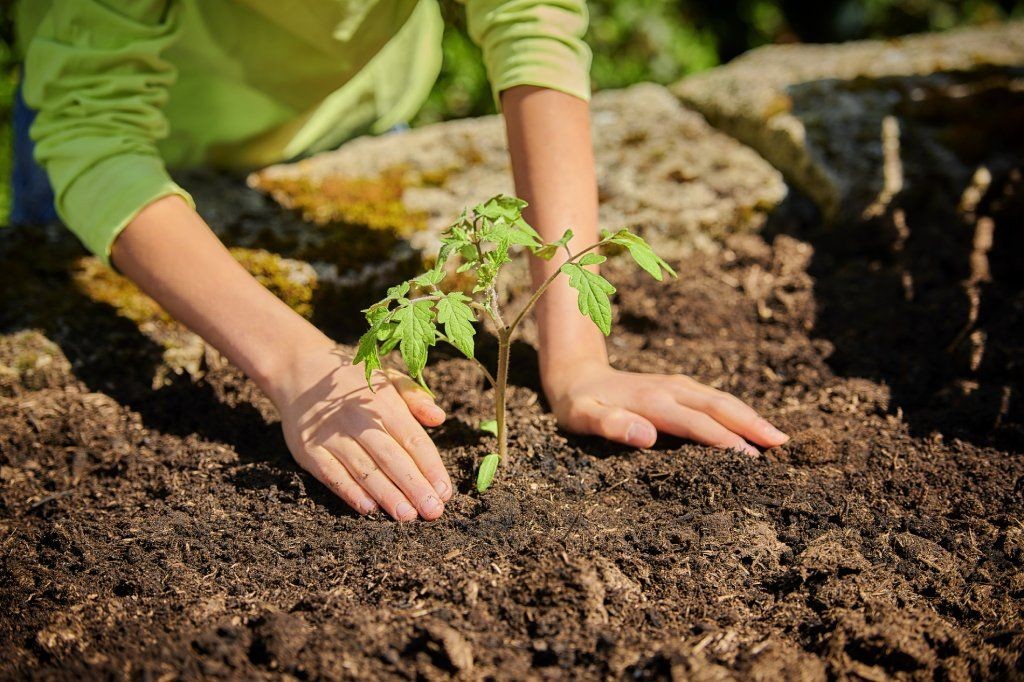 Hands of a gardener carefully planting a small tomato seedling into prepared soil
If you have “leggy” seedlings, try trench planting: dig a shallow trench instead of a deep hole. Gently lay the leggy stem horizontally in the trench, burying it and leaving only the top few inches and the top set of leaves exposed above the soil line. The buried stem will develop roots, giving the plant a more robust foundation.
After planting, water thoroughly to settle the soil and eliminate air pockets.
Spacing
Proper spacing is key for air circulation, light penetration, and nutrient access, all of which reduce disease risk and promote better yields. Space determinate varieties at least 24-30 inches (60-75 cm) apart. Indeterminate (vining) types need more room, ideally 30-36 inches (75-90 cm) between plants. If planting in rows, leave 4-5 feet (1.2-1.5 m) between rows.
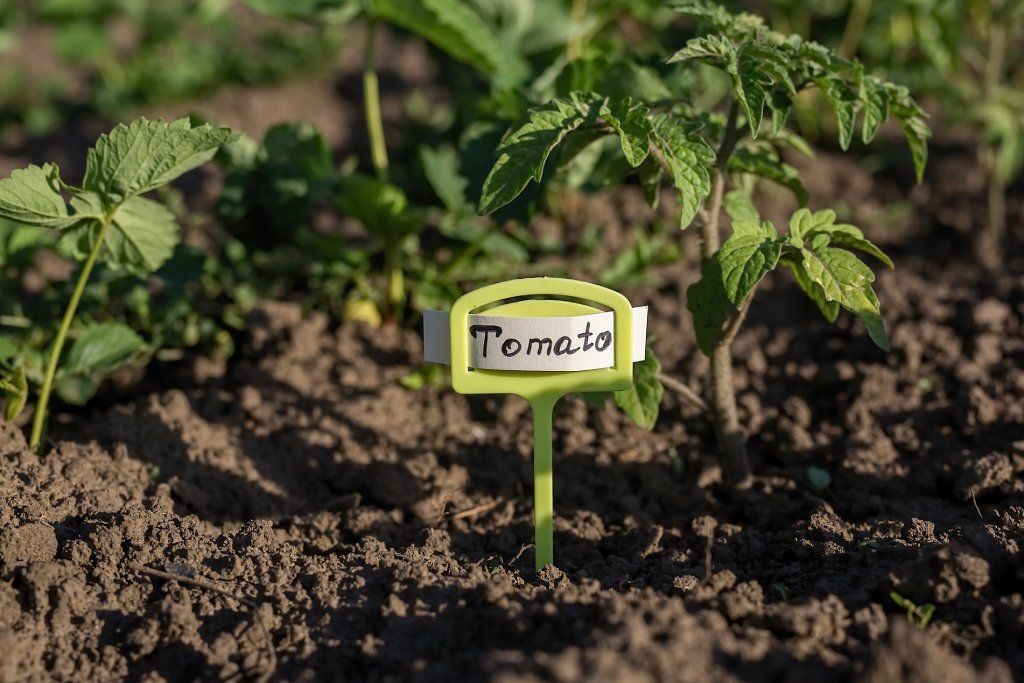 Young tomato plants growing in garden soil supported by a wooden stake
Essential Care for Thriving Tomato Plants
Once your tomatoes are planted, consistent care will ensure a healthy, productive season.
Sunlight Needs
As mentioned, tomatoes are sun worshippers. A minimum of 6 hours of direct sunlight is needed for fruit production, but 8 or more hours is ideal for maximizing your harvest. Ensure surrounding plants don’t shade them as they grow.
Soil Requirements
Beyond the ideal pH and drainage, good soil provides essential nutrients. Loamy, sandy soil is often considered best, but amending any soil type with compost and organic matter will improve its suitability for tomatoes. The chemical makeup of your soil affects growth; for example, too much nitrogen can result in lush leafy growth but few flowers or fruits. A soil test can pinpoint specific deficiencies.
Fertilization
If you haven’t amended your soil generously with compost before planting, or if a soil test indicates nutrient deficiencies, fertilizing is beneficial. Use a balanced fertilizer (like 8-8-8 or 10-10-10) if nitrogen is low. If your soil is balanced or high in nitrogen, opt for a fertilizer with lower nitrogen and higher phosphorus and potassium (like 5-10-5 or 5-10-10) to encourage flowering and fruiting rather than just leaf growth.
 Hand applying granular fertilizer to the soil around a tomato plant with a small trowel
Organic options like fish emulsion, liquid seaweed extract, or compost tea are also excellent choices. Fertilize 2-3 weeks after transplanting once the plants are established. A second application when fruit begins to set is often sufficient. Avoid over-fertilizing, as this can harm plants.
Watering
Consistent and proper watering is perhaps the most critical factor for healthy tomato plants and preventing common issues like blossom end rot.
Water deeply and less frequently rather than shallowly and often. Aim to keep the soil consistently moist, like a well-wrung sponge, but never soggy. Check the soil moisture by sticking your finger about an inch or two (2.5-5 cm) deep. If it feels dry, it’s time to water. Wilting leaves, especially in the morning, are a clear sign of thirst.
Watering in the early morning is best. This allows the plants to absorb water throughout the day and ensures foliage dries before evening, reducing the risk of fungal diseases. Avoid overhead watering with sprinklers, as wet leaves can invite disease. Instead, water at the base of the plant using a watering can, soaker hose, or drip irrigation.
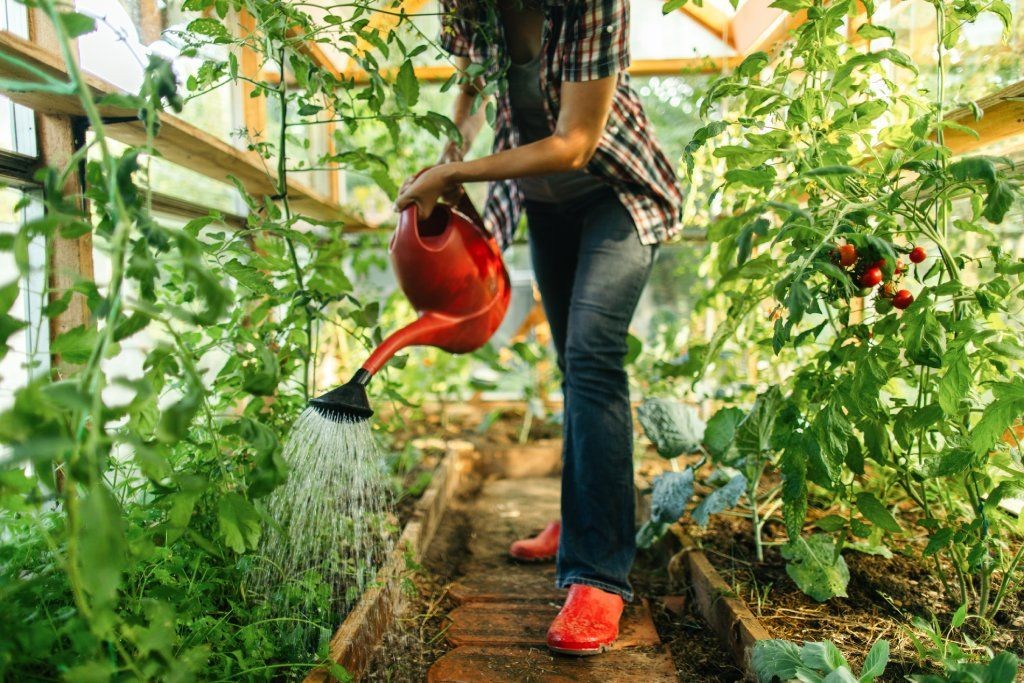 Watering tomato plants at the base using a hose in a greenhouse environment
In hot, dry weather, plants may need watering daily. In cooler, wetter periods, every few days might suffice. Pay attention to the weather and the soil condition. Overwatering is just as harmful as underwatering, leading to root issues. Ensure excess water can drain away easily.
Mulching
Applying a layer of organic mulch around the base of your tomato plants offers numerous benefits. Mulch helps retain soil moisture, suppresses weeds that compete for nutrients and water, regulates soil temperature, and prevents soil splashing onto lower leaves, which can spread soilborne diseases.
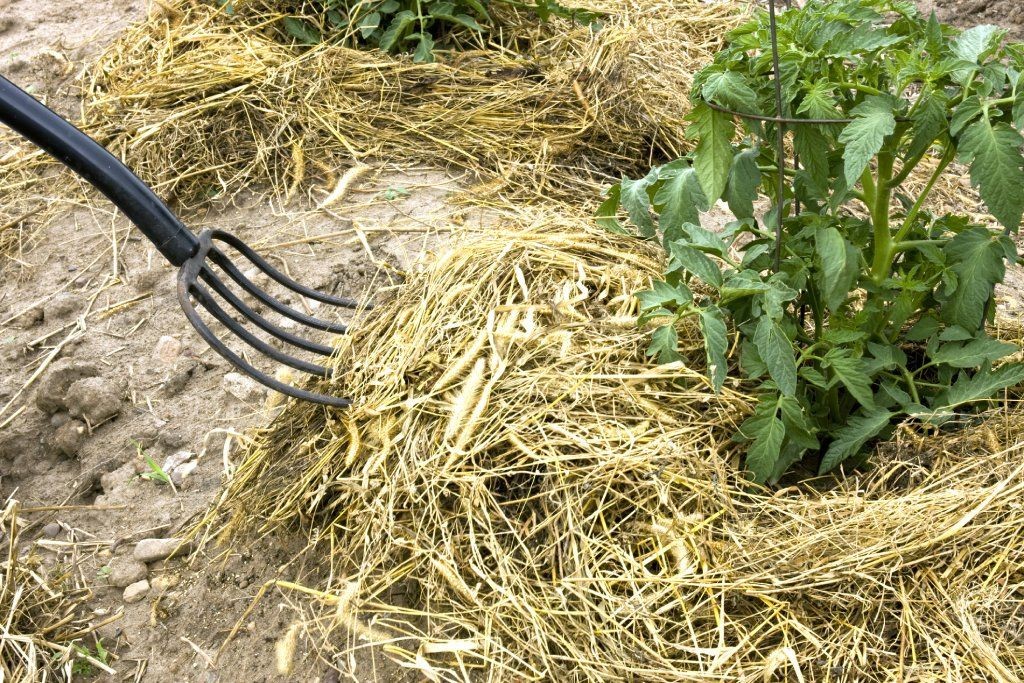 Applying hay mulch around the base of a tomato plant using a pitchfork
Good mulching materials include straw, dried grass clippings (ensure they haven’t been treated with herbicides), compost, or shredded leaves. Apply a 2-4 inch (5-10 cm) layer around the plant, keeping it a couple of inches away from the main stem to prevent rot.
Supporting Growth: Staking and Caging
Given their growth habit and heavy fruit load, most tomato plants benefit significantly from support. Staking or caging keeps the fruit off the ground, reducing pest and disease issues, improves air circulation, and prevents branches from breaking under weight.
Tomato cages are easy to use, especially for determinate varieties. Place the cage over the young plant shortly after transplanting. As the plant grows, guide the branches inside the cage.
For indeterminate varieties or if cages aren’t sufficient, staking provides vertical support. Sink a sturdy stake (wood, bamboo, or metal) into the ground 6-8 inches (15-20 cm) away from the base of the young plant (around 1 foot tall) to avoid damaging roots. As the plant grows, loosely tie the main stem to the stake at intervals using soft ties or fabric strips that won’t cut into the stem. Continue tying as the plant gains height. Some vining types may require multiple stakes or a trellis system.
Pruning
Pruning tomato plants, particularly indeterminate types, can help manage their growth, improve air circulation, and potentially direct the plant’s energy into fruit production rather than excessive foliage. Determinate varieties generally do not require pruning.
The most common practice is removing “suckers” – small shoots that grow in the crotch (axil) between the main stem and a leaf branch. Removing suckers early (when they are small enough to pinch off with your fingers) helps control the plant’s size and keeps it more open. However, leaving some suckers can result in more fruits, albeit potentially smaller ones later in the season. It’s a matter of preference and plant vigor.
If you choose to prune, do so on a dry day to allow cuts to heal quickly, reducing disease entry points. Use clean, sharp pruning shears, sanitizing them between plants if disease is suspected. Remove any yellowed, diseased, or damaged leaves or stems immediately. While removing some lower leaves can improve air circulation, ensure the plant retains enough foliage to shade developing fruit from sunscald.
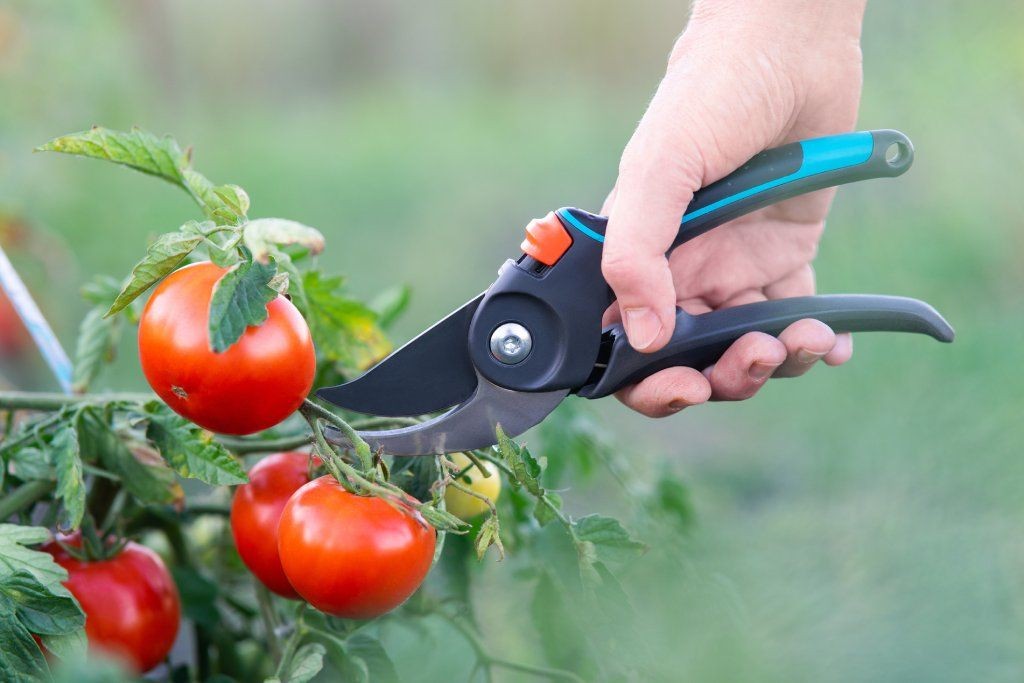 Hand using pruning shears to remove a side branch from a tomato plant
Growing Tomatoes in Containers
Don’t have a traditional garden bed? Growing tomatoes in containers is an excellent solution for patios, balconies, or small yards. With the right setup, container-grown tomatoes can be just as productive.
Choose large containers – a minimum of a 5-gallon (18.9 L) size is recommended per plant, and larger is better. Ensure containers have adequate drainage holes at the bottom. Options include large pots, buckets (with drilled holes), half-barrels, or fabric grow bags. Determinate varieties are generally the best choice for containers due to their more manageable size.
Use a high-quality potting mix specifically designed for containers, not garden soil, which can compact too much in pots. Mix in organic matter like compost or a bit of perlite for improved drainage and aeration.
Container plants dry out more quickly than those in the ground, especially in warm weather. They require more vigilant watering, sometimes daily or even twice daily during peak summer heat. Check the soil moisture frequently and water deeply until water runs from the drainage holes. Avoid letting the pot sit in standing water.
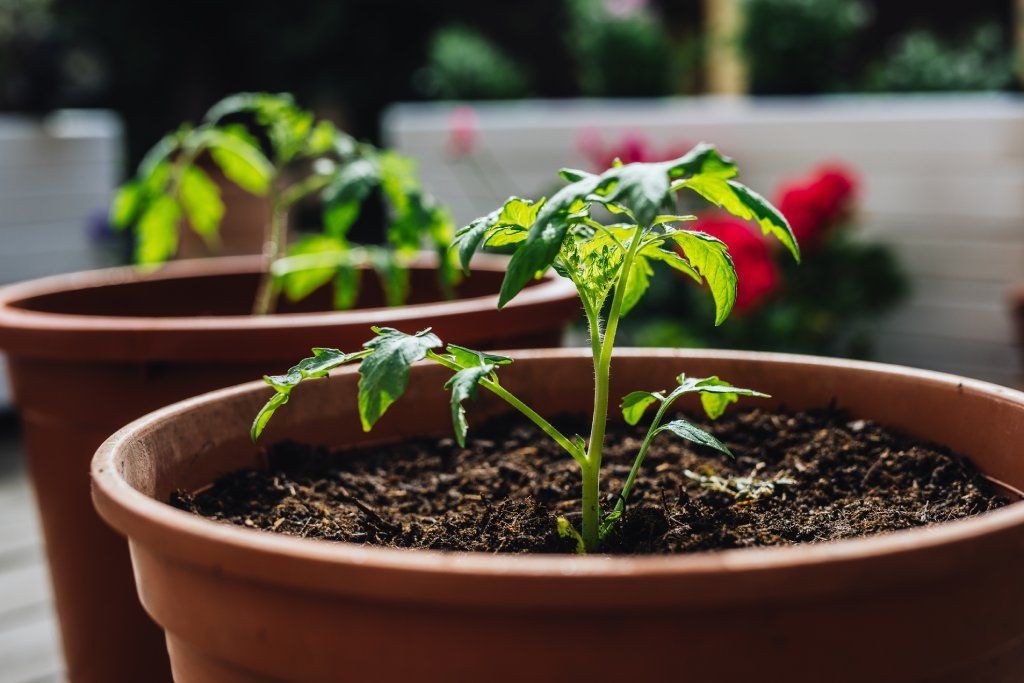 Healthy tomato plants thriving in large containers on a patio
Container plants also rely entirely on you for nutrients, so they often benefit from more frequent, dilute fertilization compared to in-ground plants.
Dealing with Tomato Plant Problems
Despite best efforts, tomato plants can face challenges from pests, diseases, or environmental stress. Early detection and action are key to minimizing damage.
Common signs of problems include yellowing leaves, curled or wilting foliage, spots on leaves or fruit, or visible insects. Environmental issues like inconsistent watering (leading to blossom end rot or cracking) or nutrient deficiencies can also cause symptoms. Pests like hornworms, aphids, or spider mites can quickly damage plants. Fungal and bacterial diseases are also common, especially in humid conditions or when leaves stay wet.
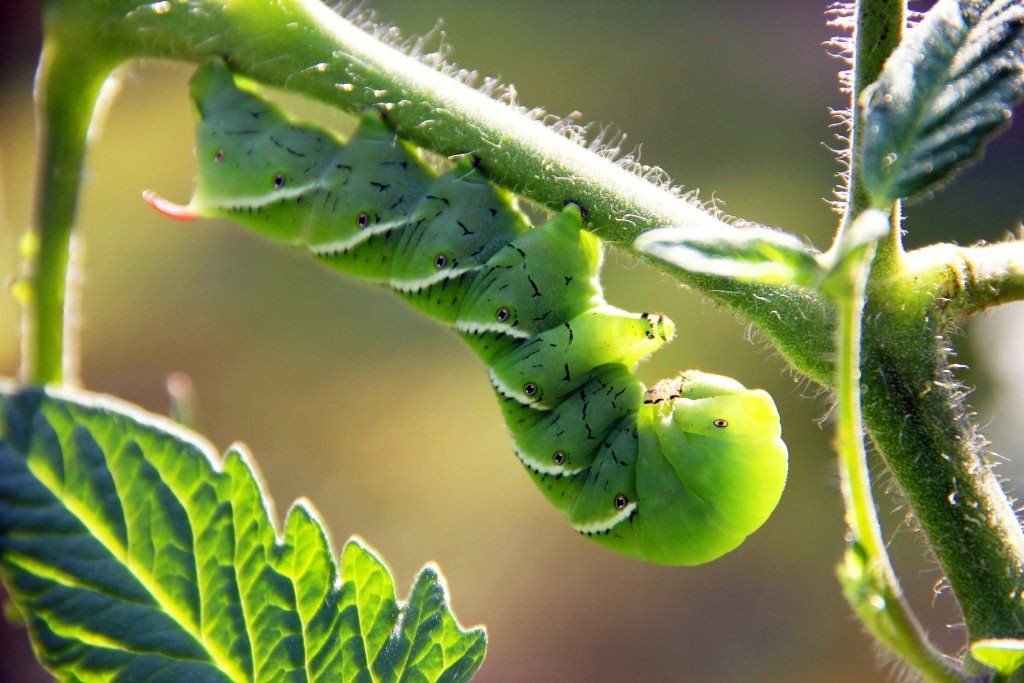 Large green tomato hornworm caterpillar feeding on a tomato plant stem
Regularly inspect your plants. If you spot diseased leaves or stems, prune them off promptly using clean, sanitized tools and discard the affected material away from the garden to prevent spread. For pest issues, handpicking larger pests like hornworms is effective. Organic solutions like horticultural soap or neem oil can help control smaller insects. For fungal issues, organic fungicides are available.
One of the best defenses is prevention: choose disease-resistant tomato varieties whenever possible. This information is usually listed on seed packets or plant tags. Good cultural practices – proper watering, spacing, air circulation, and clean gardening habits – significantly reduce the likelihood of many problems.
Harvesting and Storing Your Tomato Bounty
The reward for your efforts arrives with harvest time! Tomatoes typically ripen about 6-8 weeks after flowering, usually hitting their peak in late summer.
Tomatoes are one of the few fruits that can ripen successfully off the vine with little loss of flavor once they reach a certain stage. You don’t have to wait for them to be fully red (or their mature color).
For best flavor, pick tomatoes when they are fully colored and feel slightly soft when gently squeezed. Harvest in the morning after the dew has dried. To pick, gently twist or pull the fruit from the plant, or use clean garden snips to cut the stem just above the fruit.
You can pick tomatoes at the “breaker stage” – when they show a blush of pink or their mature color on the bottom – and ripen them indoors. This is useful if cool weather is approaching, to protect fruit from pests, or to manage the harvest timing.
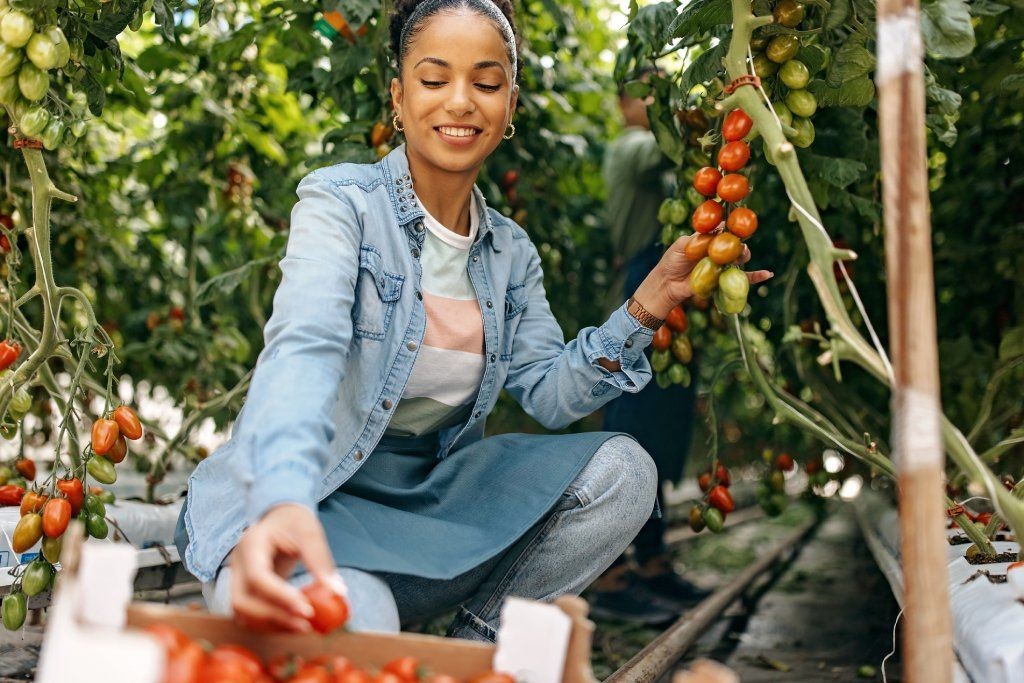 Woman harvesting ripe red tomatoes directly from the plant vine
To ripen green or breaker-stage tomatoes indoors, place them in a paper bag or cardboard box in a warm spot (65-70°F or 18-21°C). Adding a ripe banana or apple to the bag can speed up the process due to the ethylene gas these fruits produce. Mature green tomatoes typically ripen in 1-2 weeks at these temperatures.
To slow down ripening for storage, wrap clean, dry, slightly immature fruits individually in newspaper and store them in a cool (55-60°F or 13-16°C), dark place like a cellar. Bringing them back to room temperature will restart the ripening process.
Propagating Tomatoes from Cuttings
Want more tomato plants without buying seeds or seedlings? You can easily propagate new plants from existing ones using cuttings, often taken from suckers.
Choose a healthy, vigorous sucker from a favorite plant that is about 6-8 inches (15-20 cm) long. Snip it off cleanly. Remove any flowers, buds, and the lower leaves, leaving only the top two or three leaves.
You can root cuttings in water or moist potting soil. If using water, place the cutting in a glass or jar of water, ensuring the lower nodes where you removed leaves are submerged. Place in a bright spot out of direct sun. Roots should appear within a week or two. While water rooting is fast, roots formed in soil are often stronger. To root in soil, plant the prepared cutting deep enough so that the lowest remaining leaves are just above the soil line. Keep the soil consistently moist and place in a bright, warm location.
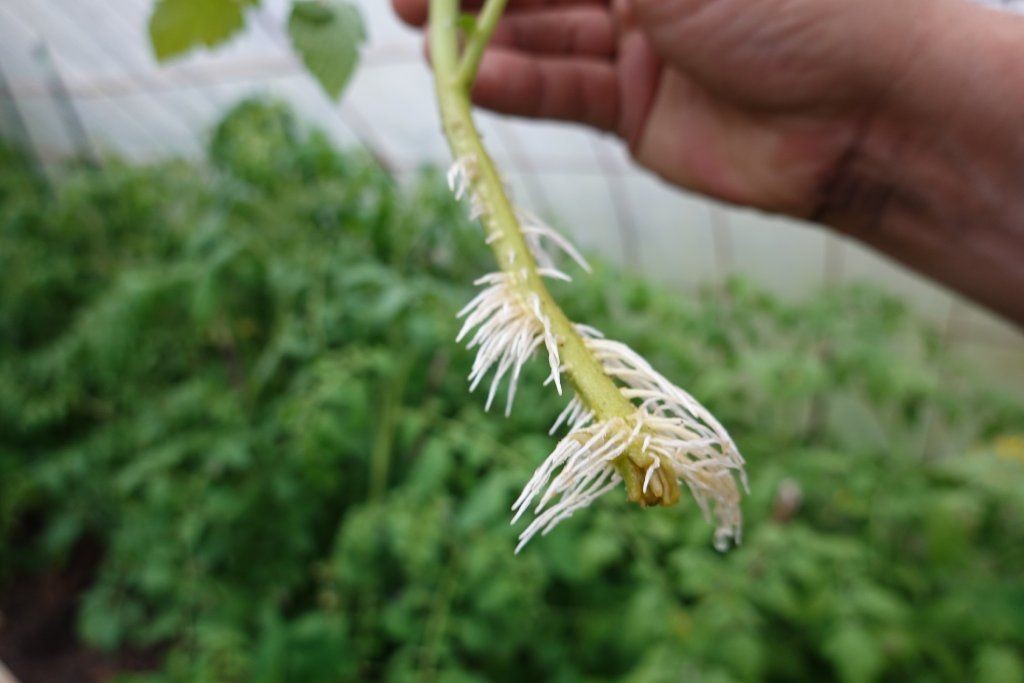 Tomato cutting showing new white roots developing from the stem nodes
Once the cutting has developed a good root system (you’ll feel resistance when gently tugging if rooted in soil, or see substantial roots in water), usually within 2-3 weeks, it’s ready to be transplanted into a larger pot or directly into the garden (following the same timing and planting guidelines as for seedlings).
Frequently Asked Questions (FAQs)
Growing tomatoes often leads to common questions. Here are answers to a few:
Are tomato plants toxic?
While the ripe fruit is safe and nutritious, the leaves and stems of tomato plants contain compounds called glycoalkaloids, including tomatine. These can be toxic if ingested in large quantities and should not be eaten. The green, unripe fruit also contains these compounds, though in lower concentrations that decrease as the fruit ripens.
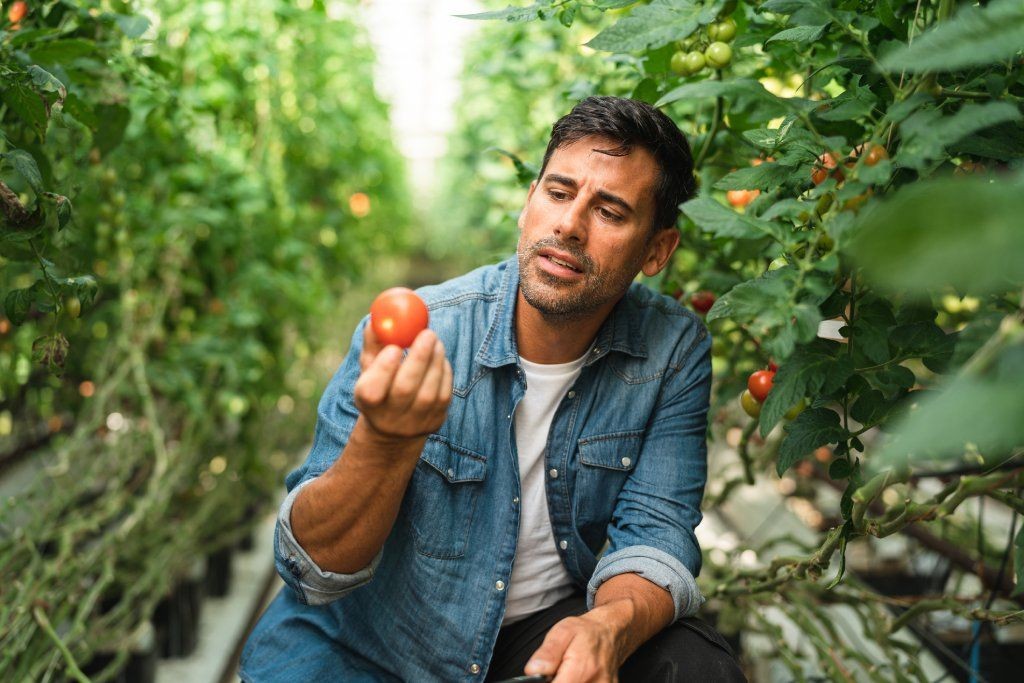 Person examining a fresh, ripe tomato held in their hand
Are coffee grounds good for tomato plants?
Used coffee grounds can be beneficial for tomato plants when added to compost or worked into the soil in moderation. They add nitrogen and organic matter, improving soil structure. However, applying large amounts directly to plants can potentially cause issues due to their acidity and nitrogen content. Use sparingly.
Can you eat green tomatoes?
Yes, you can eat green tomatoes, but it’s best to do so in moderation, especially if they are truly unripe (not just a green variety). As mentioned, unripe green tomatoes contain low levels of glycoalkaloids which can cause digestive upset in some people if consumed in large quantities. They are often used in cooking, such as fried green tomatoes, which can reduce some of these compounds.
Conclusion
Growing your own tomatoes is a rewarding endeavor that connects you directly to your food source. By understanding their fundamental needs for sunlight, proper soil, consistent watering, and support, you can overcome common challenges and enjoy a season filled with fresh, flavorful fruit. Remember to choose varieties suited to your conditions, prepare your planting site well, provide ongoing care, and keep an eye out for potential problems.
Taking the time to learn these essential techniques will empower you to cultivate healthy, productive tomato plants year after year. For all your gardening needs, from quality soil amendments and organic fertilizers to tools and supplies, explore the wide selection available at Biogarden.asia. Happy growing, and get ready to enjoy the taste of success – one juicy tomato at a time!