


No products in the cart.
NEWS
Mastering the Art of Arranging Roses in Tall Vases
Roses are beloved the world over, known for their beauty and fragrance. While a single rose can captivate, knowing how to arrange a stunning bouquet can elevate your home decor and bring immense joy. Arranging roses in tall vases is a particularly popular technique, adding elegance and drama to any space. As horticulture experts here at Biogarden.asia, we’re passionate about helping you connect with the beauty of plants, whether you’re growing them or arranging them. This guide provides simple, effective methods for creating breathtaking rose arrangements in tall vases, making the process both beautiful and surprisingly easy.
Essential Preparations for Arranging Roses in Tall Vases
Before you even think about placing a single stem, a little preparation goes a long way towards ensuring your arrangement is not only beautiful but also lasts longer. Proper preparation is the foundation of a successful and lasting display.
Gather Your Supplies
The good news is you don’t need a vast array of specialized tools. Here’s what’s essential:
- Roses: The star of the show! The quantity and type will depend entirely on the style you envision and the size of your vase. Don’t hesitate to include some smaller flowers or filler greenery to add texture and depth – think baby’s breath, ferns, or eucalyptus.
- Tall Vase: This is the defining element. Tall vases come in countless shapes, materials (glass, ceramic, metal), and neck widths. Choose one that complements your style and the space where the arrangement will be displayed.
- Sharp Shears or Knife: Crucial for making clean cuts that allow the stems to absorb water efficiently.
- Water: Clean, room-temperature water is best.
That’s really all it takes to start creating your own beautiful rose arrangements in a tall vase!
Prepare Your Roses
Once you have your roses, proper handling is key to their longevity.
- Gently remove any excess leaves that would fall below the waterline in your vase. Submerged leaves decay quickly, contaminating the water and promoting bacterial growth that shortens the flowers’ life.
- If your roses have thorns, it’s generally recommended to leave them on. Cutting thorns can create wounds on the stem, making them entry points for bacteria. Only remove thorns if absolutely necessary for handling, and do so carefully.
Clean Your Vase
This step is often overlooked but critically important.
- Before adding water or flowers, thoroughly wash your vase with soap and water. Rinse completely to remove any residue.
- Dry the vase if you have time, but ensuring it’s free of dirt and bacteria is the main goal. A clean vase prevents premature wilting caused by microbial contamination.
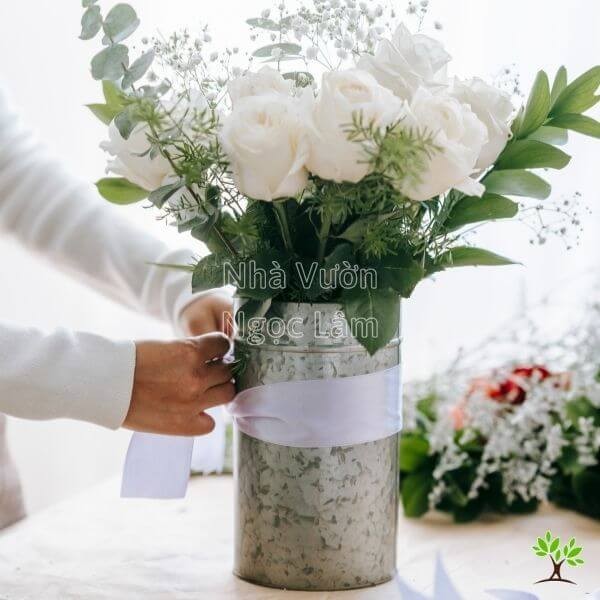
Step-by-Step Guide to Arranging Roses in Tall Vases
While specific styles have their nuances, there are fundamental steps that apply to most arrangements. Mastering these basics will give you the confidence to experiment with different looks.
 Preparation area with a bouquet of roses, shears, and a clean vase
Start with a Clean Base
Ensure your vase is clean and filled with fresh, room-temperature water. As mentioned in the preparation section, adding a floral preservative, a tiny amount of bleach (a drop or two), or even a splash of lemon juice or soda can help inhibit bacterial growth and provide nutrients. Aim for water around 35-40°C (95-104°F) initially, as this can help flowers hydrate more quickly.
Trim Stems Correctly
Using your sharp shears or knife, cut the rose stems at a 45-degree angle. This diagonal cut increases the surface area that can absorb water, significantly helping the rose stay hydrated and fresh. Depending on your desired arrangement height and style, you will cut the stems to different lengths. Always cut stems while they are submerged in water or immediately before placing them in the vase to prevent air bubbles from blocking water uptake.
Create Your Structure or Shape
This is where your creativity comes in. Based on the style you’ve chosen (or are creating), begin placing the main rose stems. Consider the shape you want to achieve – spherical, fan, vertical, etc. Start building the basic framework with your primary flowers. For taller arrangements, often the tallest stems go in the center or back, with shorter stems gradually filling in the space.
Add Filler Flowers and Greens
Once your main structure of roses is established, strategically place your filler flowers and greenery. These elements add volume, texture, and visual interest, helping to fill gaps and soften the lines of the arrangement. Ensure they complement the roses without overpowering them.
Finishing Touches
Step back and view your arrangement from different angles. Adjust stems as needed to achieve the desired shape and balance. Trim any stray leaves or petals. Wipe down the outside of the vase. Your beautiful rose arrangement is complete! This entire process can often be done in under 30 minutes once you have your supplies ready.
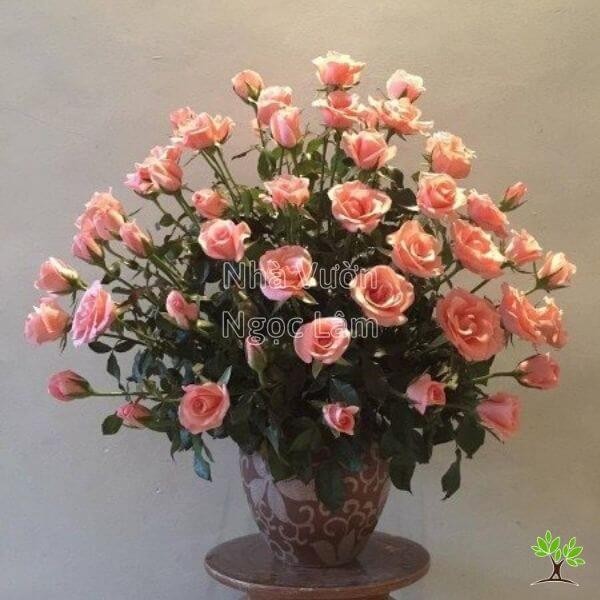
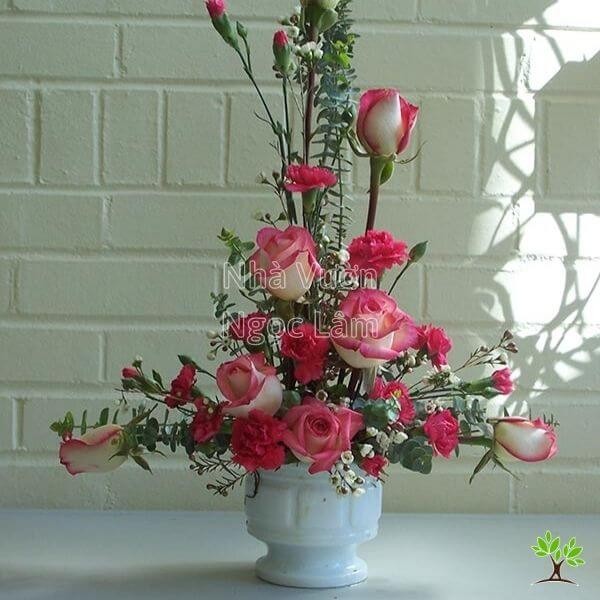
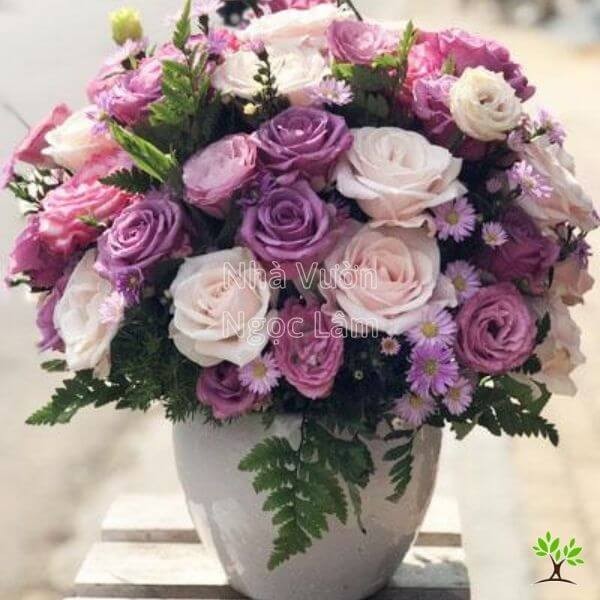
Popular Rose Arrangement Styles for Tall Vases
Arranging roses in tall vases offers versatility. Here are some common and beautiful styles you can easily recreate, or use as inspiration for your own unique design.
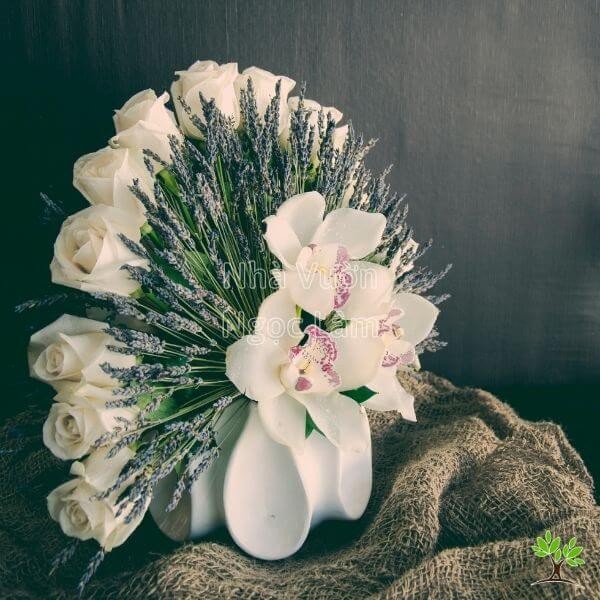
The Classic Fan Shape
 Rose arrangement in a tall vase shaped like a fan
This style is a timeless favorite. It requires a good number of roses, arranged to spread outwards from the vase like a fan. The stems should be carefully placed to create a balanced, even spread, resembling the spokes of a fan. This style is versatile and works well in various settings, often placed against a wall or as a centerpiece viewed from one side. When arranging in this style, choosing roses with slightly longer stems makes shaping easier.
To create a fan shape in a tall vase, you’ll typically use floral foam anchored at the top of the vase opening.
- Soak your floral foam thoroughly and secure it firmly in place. You might use waterproof tape to hold it.
- Start by inserting the tallest, straightest stem in the center-back of the foam. This sets the height of your fan.
- Next, insert stems on either side of the central rose, ensuring they are balanced and slightly shorter. Continue adding layers of roses, working outwards and downwards, cutting each stem shorter than the previous one to build the fan shape. Aim for symmetry on both sides.
- Use roses with a natural curve towards the outer edges to enhance the fan’s graceful shape. Straighter stems work well in the center.
- Ensure the flowers gradually get shorter as you move towards the front and sides of the vase opening.
- Finally, fill in any gaps and use excess foliage to cover the floral foam base, creating a lush, finished look.
This method allows you to create a dramatic, structured arrangement perfect for display on shelves or side tables.
Elegant Vertical Arrangements
 Tall vertical rose arrangement with sparse greenery
Vertical arrangements emphasize the height and elegance of the rose stems themselves. The focus is on the upward line, with the flowers typically standing tall above the vase opening. This modern and sophisticated style is excellent for offices, living rooms, or contemporary dining tables. It works beautifully not only with roses but also with other long-stemmed flowers.
This style often requires only a few select stems, maybe 2-3 roses of the same color, paired with minimal filler like baby’s breath or delicate ferns. A narrow-necked glass or ceramic vase is ideal; even a repurposed wine bottle can work.
- Fill your vase or bottle halfway with water.
- Strip excess leaves from the lower part of the rose stems. Cut the stems to varying lengths, ensuring the tallest will stand significantly above the vase.
- Insert the roses into the vase, placing the shorter stems towards the front and the tallest stems at the back. A good rule of thumb is for the tallest rose to be 1.5 to 2 times the height of the vase itself.
- If adding filler, place it strategically to complement the roses without overwhelming them. Baby’s breath near the rim or a few delicate fern fronds lower down can add interest.
This simple yet impactful style is quick to assemble and perfect for highlighting the natural form of the rose.
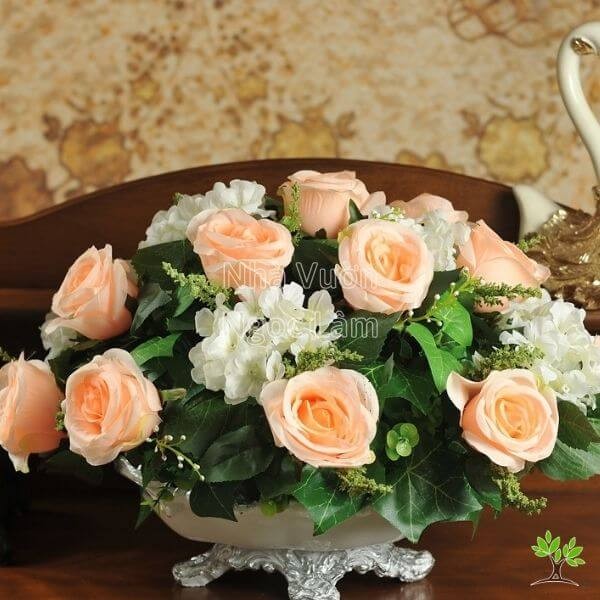
Full and Round Dome Shape
 Rose arrangement in a tall vase shaped like a dome or hemisphere
The dome style aims to create a perfect, rounded, hemispherical shape of flowers sitting atop the vase. The arrangement should look balanced and full from all angles. This style requires careful placement to ensure a smooth, even curve. The height of the roses from the vase rim in this style is typically quite uniform, perhaps 15-20 cm (6-8 inches).
To achieve a beautiful dome, you’ll need a tall vase, ideally with a slightly wider opening, and floral foam. You’ll also need a good number of large-headed roses, along with filler flowers and foliage.
- Secure a soaked floral foam block firmly onto the vase opening.
- Begin by inserting one rose stem directly in the center of the foam; this stem should be the highest point of your dome.
- Next, place roses around the central stem, distributed evenly to form the base circumference of the dome, right near the edge of the foam/vase rim. These stems should be cut to a uniform, shorter length than the central stem and inserted at an angle pointing slightly upwards and outwards.
- Fill in the spaces between the outer roses and the central rose with more stems, gradually cutting them longer as you move towards the center. Aim for a smooth, rounded transition. You can add more roses to make the dome larger.
- Finally, add filler flowers and foliage to blend the roses, fill gaps, and enhance the overall shape. Foliage is often placed lower down to cover the foam and provide a base for the dome of flowers.
This style creates a rich, luxurious look, perfect for centerpieces or prominent displays.
Timeless Oval Design
 Rose arrangement in a tall vase shaped like an oval
The oval arrangement is a classic that never goes out of style. It’s versatile and suits nearly any space or type of flower, though it’s particularly striking with roses. The shape is taller than it is wide, tapering gracefully at the top and bottom.
To create an oval rose arrangement in a tall vase, you’ll need floral foam, a bunch of roses, and complementing filler flowers and foliage. Choose filler colors that harmonize with your roses.
- Secure a soaked floral foam block onto the top of your tall vase.
- Establish the vertical axis of the oval. Insert the tallest rose stem in the center-top of the foam, setting the overall height. Then, insert the shortest rose stem directly below it on the front face of the foam, defining the lower boundary of the oval. These two flowers should be aligned vertically.
- Insert roses on either side of this central vertical line, tapering the height downwards from the tallest stem and upwards from the shortest stem. Arrange them to create the curved sides of the oval. Place roses on the top surface of the foam for the upper curve and on the side surfaces for the body of the oval. Cut stems to appropriate lengths to maintain the oval form.
- Continue filling in the shape, adding roses between the established stems to create a full, three-dimensional oval form.
- Once the oval shape is complete with roses, strategically add filler flowers and foliage to fill in gaps, add texture, and reinforce the oval outline. Use foliage, like ferns or ivy, to cover the floral foam base.
This technique results in an elegant and enduring floral display suitable for many occasions and locations.
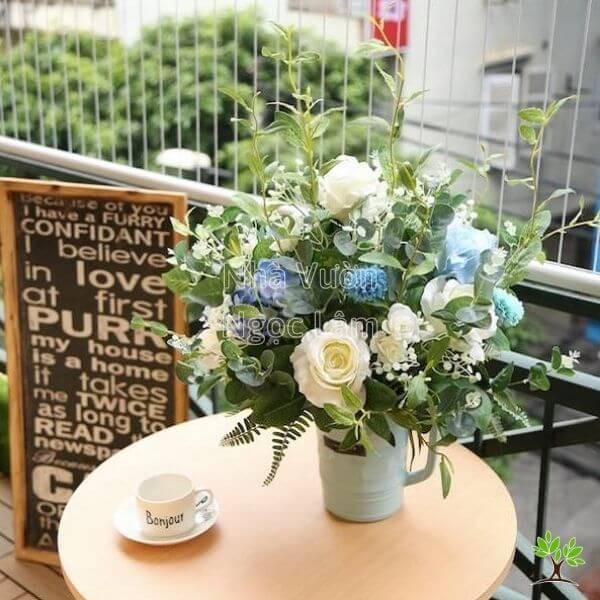
Modern and Novel Approaches
 A creative, asymmetric rose arrangement in a tall vase
Sometimes, the most striking arrangements are those that break from tradition. Using a tall glass vase allows you to experiment with unconventional shapes and material combinations. Choose a tall vase, perhaps cylindrical or round-bodied, and select long-stemmed roses, focusing on a single color or a harmonious blend of 2-3 shades. Complement with unique fillers like baby’s breath, daisies, or even dramatic branches like willow or interesting foliage like pittosporum.
- Fill your glass vase about halfway with water.
- Cut your rose stems, removing lower leaves. The beauty of this style is its flexibility. You don’t need a rigid structure.
- Arrange the stems somewhat freely in the vase. You can group them to one side, create varying heights dramatically, or weave them with branches. The idea is to be creative and make a statement. Combine roses with other flowers or foliage in a way that feels artistic and perhaps slightly wild.
- Consider adding non-floral elements like ribbons, string, or other decorative accessories to the vase itself or around the neck to personalize the arrangement further. You could tie a simple ribbon, wrap string around the vase, or even paint or decorate the glass for a truly unique look.
This approach encourages experimentation and allows your personal style to shine, creating a vibrant focal point in any room.
Simple Single Stem Elegance
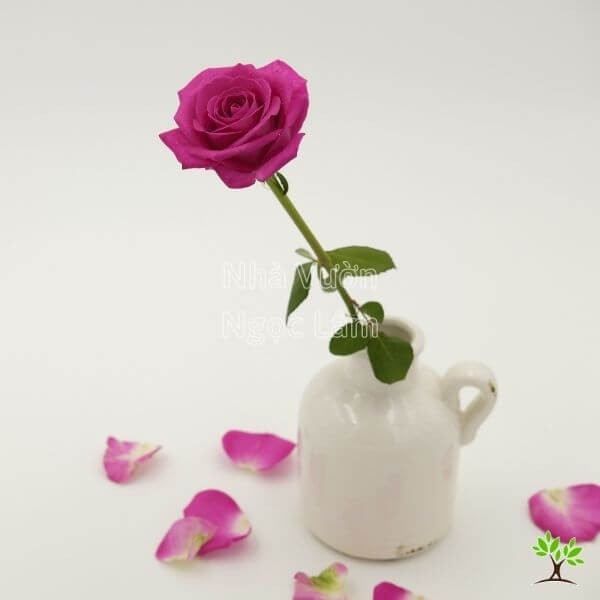 A single rose in a tall, slender vase with minimal filler
Even if you’re short on time or prefer minimalist aesthetics, you can still enjoy the beauty of roses in a tall vase. The single-stem style is the epitome of simplicity and sophistication. It focuses all attention on the exquisite beauty of one perfect rose.
This style requires just a few items: a tall, slender vase with a narrow neck (or even a clean bottle), a perfect long-stemmed rose with a large bloom, and perhaps a sprig or two of a delicate filler like baby’s breath or a small, attractive leaf. If you want to add extra flair, keep ribbons, string, or paint handy.
- Fill your vase or bottle about one-third to halfway with water.
- Strip any leaves that would be below the waterline from your chosen rose stem.
- Carefully insert the single rose into the vase. That’s it! If you have filler, add just a touch to complement the rose, maybe near the neck of the vase, keeping it minimal to avoid distracting from the main bloom.
- (Optional) Add decorative elements like a ribbon tied around the neck of the vase or a simple painted design on the glass to enhance its uniqueness.
This effortless style provides a focal point without clutter and is perfect for bedside tables, small desks, or as a delicate accent anywhere in the home.
Vintage Charm Style
 Rose arrangement in a tall, rustic-looking vase with other wildflowers
For those who love the romantic, slightly wild aesthetic of vintage decor, this arrangement style is perfect. It evokes a sense of nostalgic charm using a tall, narrow-necked vase, often with simple patterns or a classic shape. The focus is on creating a full, somewhat loose arrangement using roses at their peak bloom, often mixed with garden flowers, wildflowers, or baby’s breath.
Achieving this look, despite its seemingly simple appearance, requires careful selection and placement. You’ll need a tall vase with a narrow neck, several roses in their prime, and complementary wildflowers, baby’s breath, or other small, traditional blooms. Unlike some other styles, this one typically doesn’t require much, if any, additional foliage.
- Choose a vase with a plain or vintage-inspired pattern. Glass or ceramic works well.
- Select roses, perhaps in classic colors like deep red or blush pink, that are fully open or close to it. Combine with flowers like carnations, field daisies, or baby’s breath that fit the vintage theme.
- Cut stems so they are only slightly taller than the vase opening. The goal is a dense, packed look that spills slightly over the rim, not a dramatic height.
- Arrange the roses and filler flowers by inserting them into the narrow neck. You’ll need a good number of stems to create the desired fullness. Weave the stems together to build a rounded, slightly asymmetrical mound of flowers sitting just above the vase.
- Focus on filling all angles and ensuring the arrangement looks lush and a bit untamed, characteristic of the vintage style. Don’t be afraid to let some blooms sit lower or higher than others within the general dome shape.
This style results in a richly textured and romantic display, perfect for adding warmth and character to any room.
Expert Tips to Keep Your Roses Fresh Longer
Arranging your roses is one thing, but keeping them looking vibrant is the true mark of a skilled floral enthusiast. Drawing from our experience at Biogarden.asia, here are some key tips for maximizing the vase life of your beautiful arrangements.
Water Quality and Temperature
- Always use clean water. Tap water is generally fine, but if yours is heavily chlorinated, letting it sit overnight can help dissipate some of the chlorine, which can be harmful to flowers.
- Room temperature or slightly warm water (35-40°C) is often recommended when you first place the flowers in the vase, as stems can absorb it more efficiently.
Proper Stem Care
- As mentioned earlier, cut stems diagonally with sharp tools to maximize water uptake.
- Remove all leaves that will be submerged in water. This prevents decay and keeps the water clean.
Daily Maintenance
- Change the water daily if possible, or at least every two days. This removes bacteria and provides fresh hydration.
- When changing the water, it’s beneficial to recut a small portion (about 2-3 cm or an inch) off the bottom of each stem. This removes any blockages that may have formed and ensures continued water absorption.
- Mist the flowers lightly with a spray bottle, especially in dry environments, to help them stay hydrated through their petals and leaves.
Ideal Placement
- Keep your vase away from direct sunlight, heat sources (like radiators or electronics), and drafts. High temperatures and rapid air movement cause flowers to dehydrate quickly and wilt faster.
- Display your arrangement in a cool, well-ventilated area. Roses thrive in moderate temperatures.
Additives for Longevity
- Adding a floral preservative packet (often included with purchased flowers) to the water is highly effective as they contain nutrients, acidifiers, and anti-microbial agents.
- Simple homemade alternatives include a few drops of bleach, a splash of lemon juice, or a mixture of 2 tablespoons of white vinegar and 2 tablespoons of sugar per liter of water. Even clear sodas like Sprite or 7UP (about 1/4 part soda to 3/4 part water) can work due to their sugar (nutrient) and acidity.
Remove Wilting Flowers
- Promptly remove any flowers or leaves that show signs of wilting or decay. Decaying plant material releases ethylene gas, which accelerates the aging process of other flowers in the vase.
Start with Fresh Blooms
- If cutting from your garden, do so in the early morning when the flowers are most hydrated.
- If buying roses, choose those with firm, perky stems and buds that are just beginning to open but aren’t fully blown. Avoid flowers with bruised stems or already drooping petals.
Cleanliness is Key
- Reiterate the importance of a clean vase. Residual dirt or bacteria from previous arrangements can immediately compromise the freshness of new flowers. Wash thoroughly and ensure the vase is dry or completely rinsed before use.
By following these steps and tips, you can significantly extend the life and beauty of your rose arrangements.
In conclusion, arranging roses in tall vases is a wonderful way to express your creativity and bring natural beauty into your home. From simple single stems to elaborate dome or fan shapes, there’s a style to suit every taste and occasion. By paying attention to preparation, using proper techniques, and implementing these freshness tips, you can enjoy your stunning rose displays for days longer. We hope this guide from Biogarden.asia inspires you to create your own beautiful arrangements. Give it a try and see the difference it makes in your space!