


No products in the cart.
NEWS
How to Expertly Save Pumpkin Seeds for Planting and Snacking
As you enjoy the fall harvest or prepare that festive jack-o’-lantern, you might find yourself with a bounty of pumpkin seeds. These humble seeds hold incredible potential, whether you’re planning to cultivate your own patch of pumpkins next season or looking for a nutritious and delicious snack. Saving pumpkin seeds isn’t complicated, but knowing the right techniques for harvesting, cleaning, drying, and storing is key to ensuring their viability for planting or perfecting their texture for eating. Let’s dive into how you can easily transform pumpkin leftovers into future garden growth or tasty treats, guided by the agricultural expertise we embrace at Biogarden.Asia.
Unlocking the Potential: Why Save Your Pumpkin Seeds?
Deciding to save pumpkin seeds offers dual rewards: extending the gardening cycle and providing a healthy addition to your diet. Beyond the joy of carving, pumpkins yield valuable seeds that can serve different purposes.
Seeds for Your Spring Garden
Saving pumpkin seeds for planting can be a rewarding way to connect with your food source and save money. However, it’s important to understand a key characteristic of pumpkins: their tendency to cross-pollinate. Pumpkins belong to the Cucurbitaceae family, which includes squash, cucumbers, and melons. If these related crops are grown in close proximity, bees and other pollinators can transfer pollen between different varieties or even different species within the family. This can result in seeds that, when planted, produce plants with mixed traits, meaning they may not grow into the type of pumpkin you originally harvested from.
To harvest “true to type” seeds – seeds that will grow into a pumpkin similar to the parent plant – ideally, the parent pumpkin should come from an isolated patch of a single variety or from a non-hybrid, open-pollinated, or heirloom type. Heirloom and open-pollinated varieties are more likely to produce stable seed genetics compared to hybrids, which are often a cross of two parent lines and may not pass desired traits consistently to the next generation. While commercial growers use significant distance to prevent cross-pollination (sometimes half a mile or more), home gardeners can increase their chances by selecting seeds from heirloom or open-pollinated pumpkins and noting what other cucurbits were grown nearby.
Seeds for Your Healthy Kitchen
Pumpkin seeds aren’t just for planting; they are a nutritional powerhouse when consumed. Eating them in moderation offers significant health benefits. They are an excellent source of dietary fiber, which aids digestion. They are also packed with antioxidants that help protect your body’s cells. Furthermore, pumpkin seeds are rich in heart-healthy unsaturated fats, including polyunsaturated fatty acids and omega-3 fatty acids. These contribute to overall cardiovascular well-being. Their versatility extends beyond simple roasting; they can be used in baking, as a salad topping, blended into smoothies, or incorporated into numerous dishes.
The Essential First Step: Harvesting and Cleaning
Whether your goal is next year’s pumpkin patch or tonight’s snack, the initial steps for collecting and cleaning pumpkin seeds are the same and straightforward.
- Begin with a mature, healthy pumpkin. Gently wash the exterior to remove any soil or debris. Dry it thoroughly.
- Carefully cut the pumpkin in half using a sturdy, sharp knife.
- Use a large spoon or scoop to extract the stringy pulp and seeds from the interior cavities of both halves. Place this material into a colander.
- Hold the colander under cool, running water. Agitate the mixture with your hands, working to separate the seeds from the fibrous pulp. The pulp will wash away through the colander’s holes. Continue rinsing and separating until the seeds are relatively clean.
- You will likely find more seeds than you need, especially if saving for planting. Inspect the cleaned seeds and select the largest, plumpest ones. For planting, it’s wise to save more seeds than you intend to plant, as not all seeds will germinate. A common guideline is to save at least three times the number of plants you hope to grow. Larger seeds generally have a higher success rate.
- Once cleaned and sorted, spread the rinsed seeds in a single layer on a dry paper towel to remove excess surface moisture. Avoid piling them up, as this can cause them to stick together.
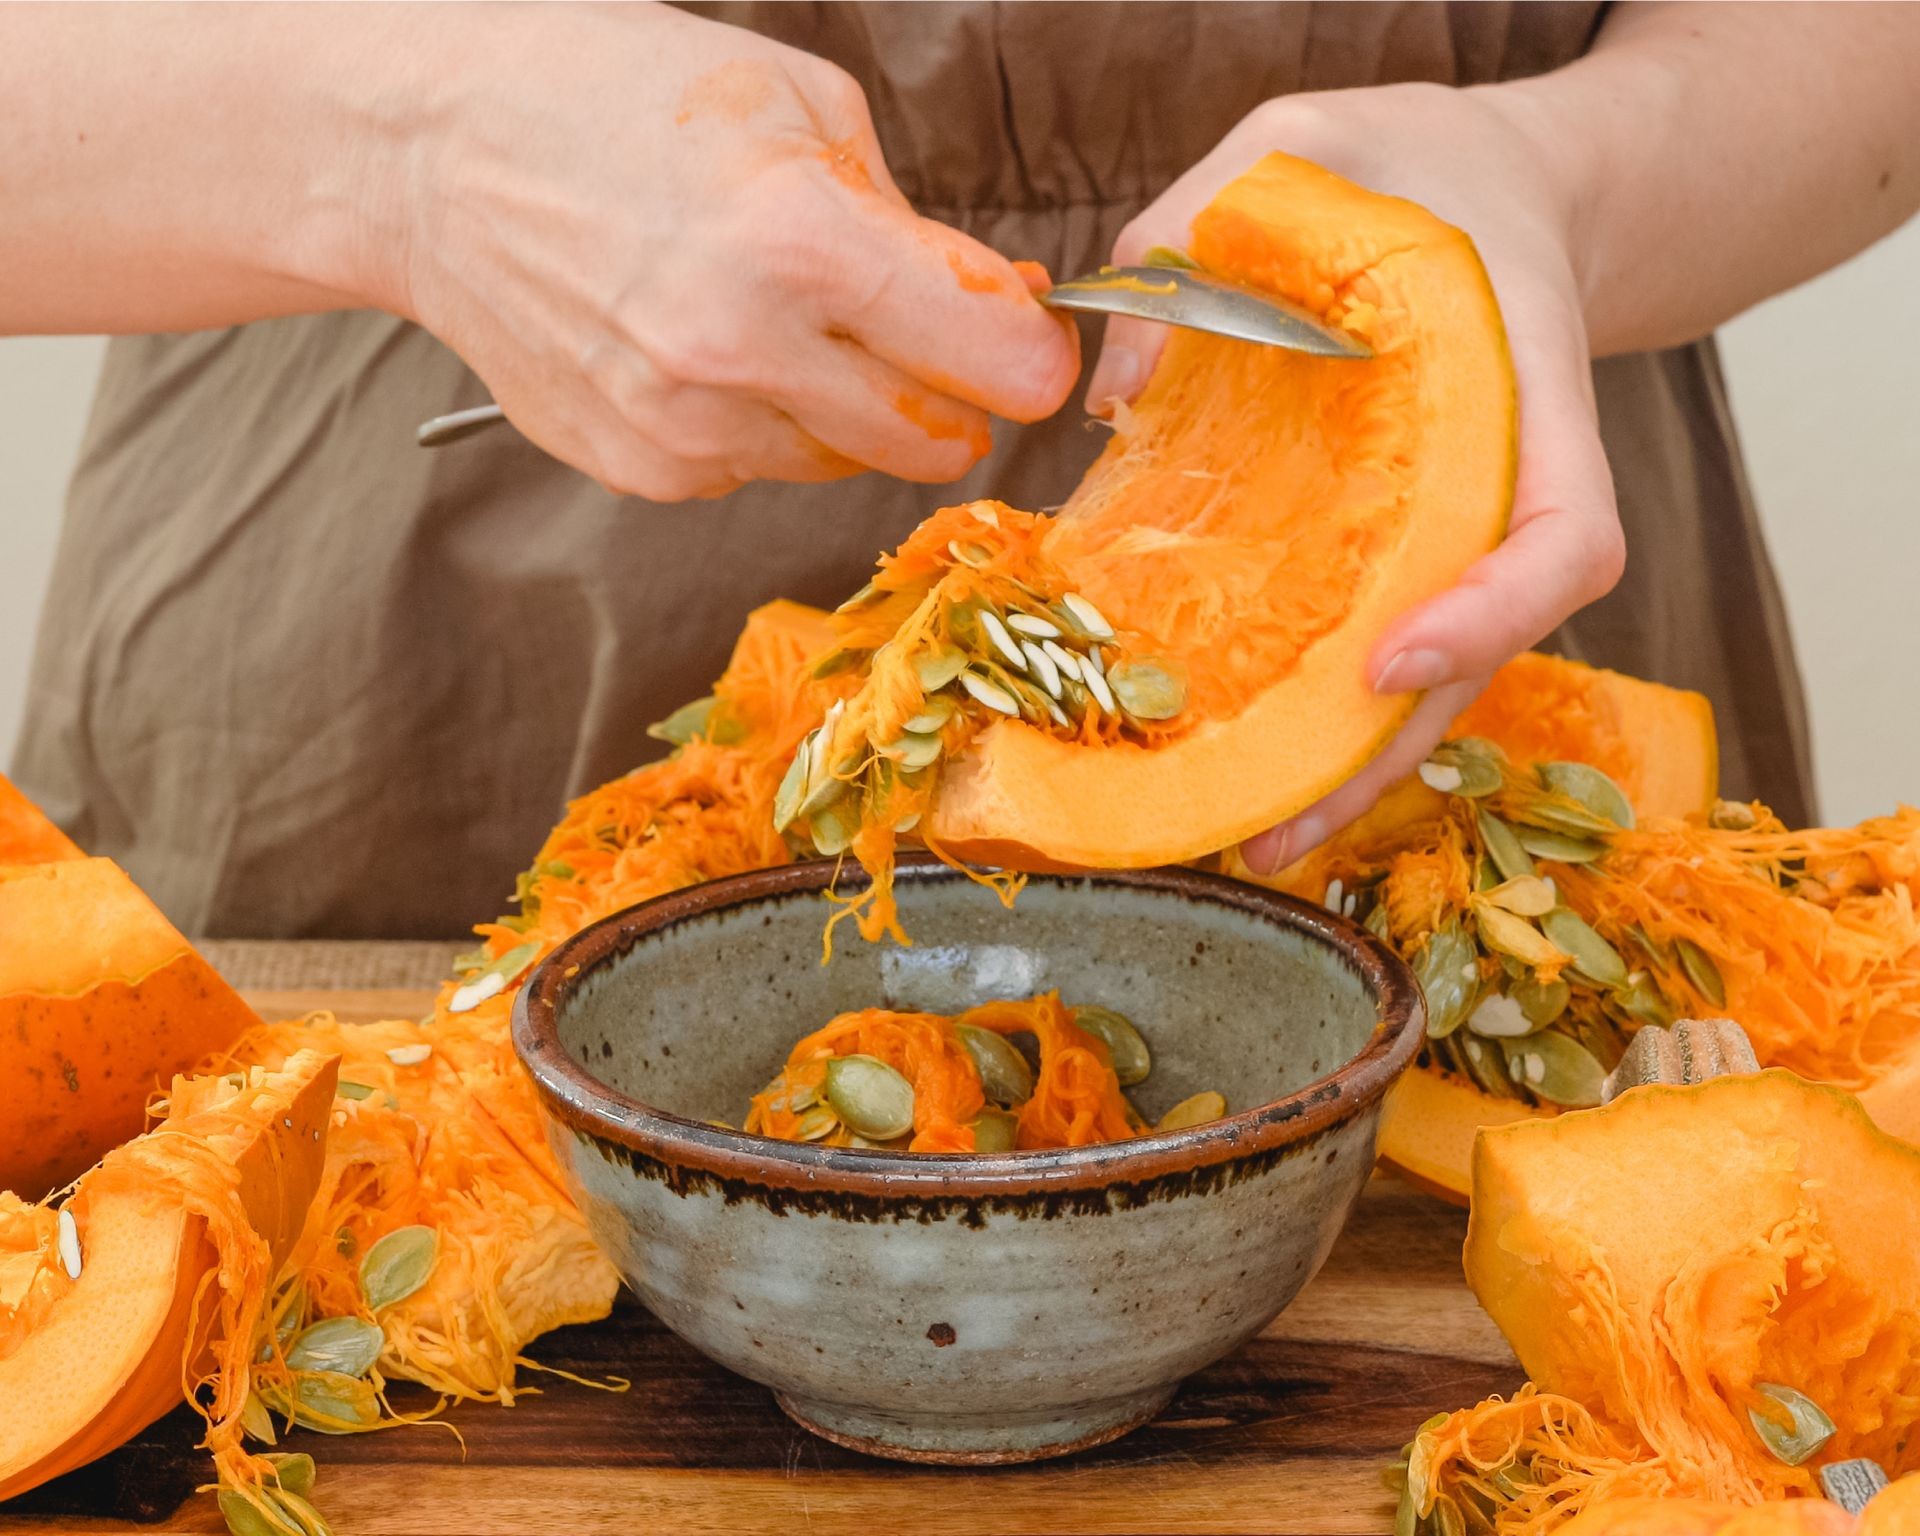 Woman scooping out pumpkin seeds from a halved pumpkin
Preparing Seeds for Their Destiny: Drying Methods
After harvesting and cleaning, the next crucial step is drying the seeds. The method and duration of drying will differ depending on whether the seeds are destined for the soil or the snack bowl.
Drying Seeds for Planting
For long-term storage leading to planting, seeds need to be thoroughly air-dried.
Spread the cleaned seeds in a single layer on a surface that allows for good air circulation from all sides, such as a window screen or a fine mesh rack. If using paper towels, be aware they might stick slightly. Allow the seeds to dry in a cool, well-ventilated location away from direct sunlight. This drying process can take several weeks. Turn the seeds periodically, especially during the first few days, to ensure even drying and prevent clumping. The seeds are sufficiently dry for storage when they are brittle and snap easily when bent, rather than bending or feeling rubbery.
Drying Seeds for Eating
If you’re planning to consume the seeds, you can use methods that dry them more quickly, preparing them for roasting or other culinary uses.
After cleaning, seeds can be air-dried as described above, but for quicker preparation, you can use a dehydrator or a low oven. Set a dehydrator to 115-120°F (46-49°C) and dry the seeds for 1-2 hours. Alternatively, use your oven set to its lowest “warm” setting (usually around 150-200°F / 65-90°C). Spread the seeds in a single layer on a baking sheet and dry for 3-4 hours. Stir the seeds frequently throughout the process to ensure they dry evenly and don’t scorch.
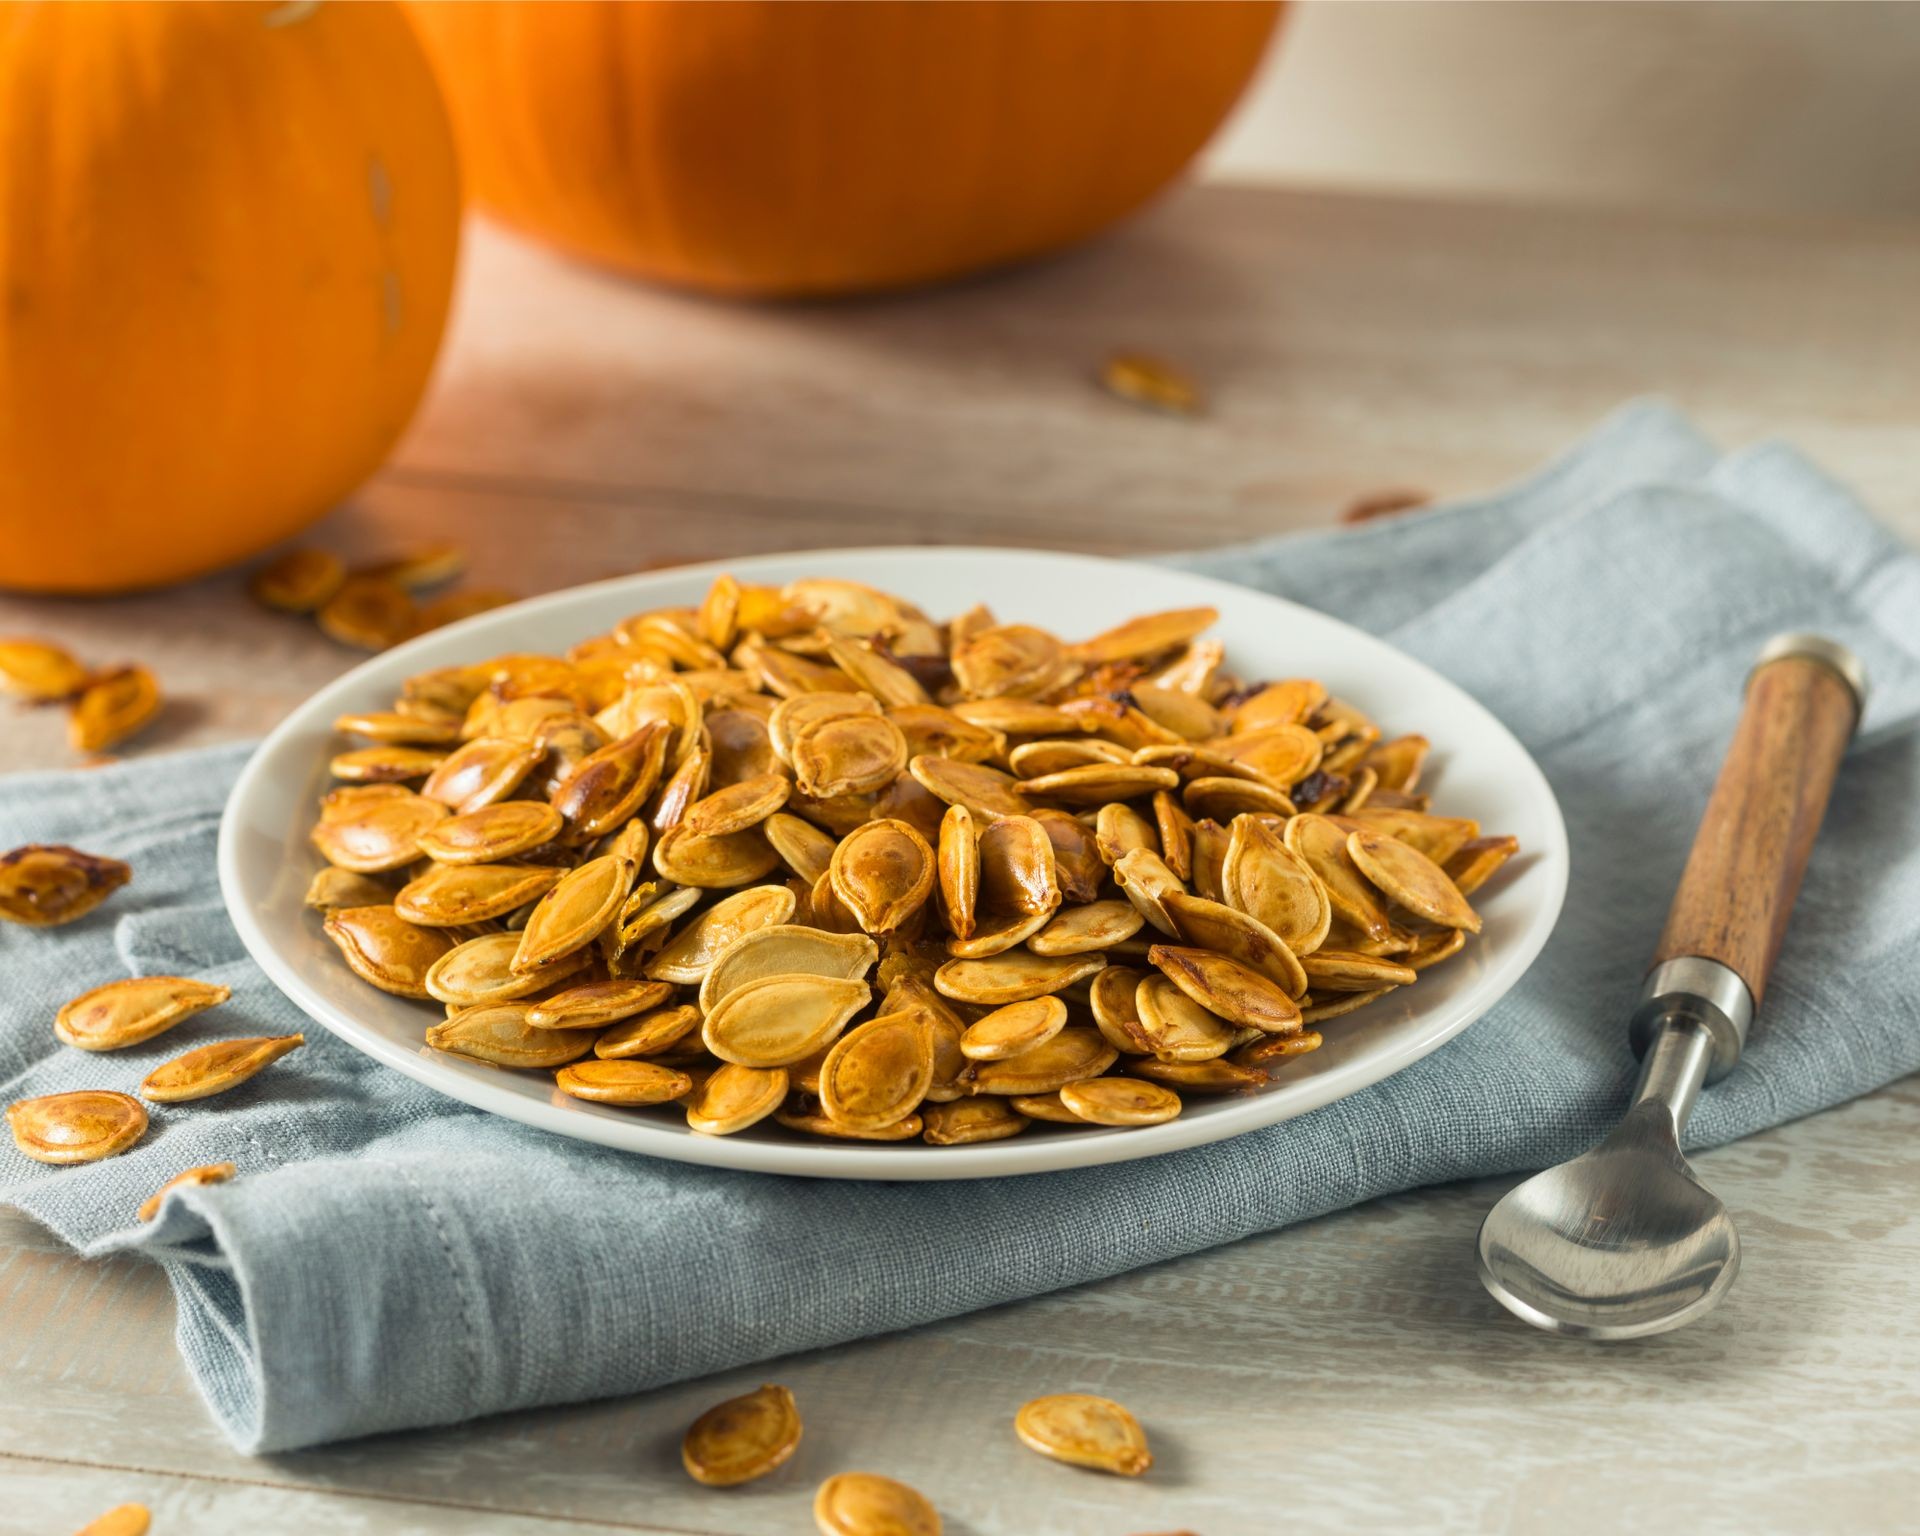 Roasted pumpkin seeds on a plate with a spoon ready to be enjoyed
Some individuals prefer to remove the outer shell (hull) of the pumpkin seed before eating. If you wish to de-hull your seeds, boiling them briefly before drying can make the hulls easier to remove. Boil cleaned seeds in salted water for about half an hour, then drain and dry them. After drying, the hulls can often be squeezed or peeled off. However, the hull is edible and contains fiber, and for many common pumpkin varieties, it’s thin enough to be eaten comfortably without removal. Certain pumpkin varieties, like Styrian or Naked Bear, naturally produce hull-less seeds, often referred to as pepitas, which are ready to eat or roast immediately after cleaning and drying.
Safeguarding Your Harvest: Proper Storage
Once properly dried, storing your pumpkin seeds correctly is vital to maintain their quality, whether they are intended for planting or eating later.
Storing Seeds for Planting Viability
To give your pumpkin seeds the best chance of germinating when spring arrives, they need to be stored in conditions that preserve their vitality. Cool, dry, and dark environments are ideal for seed storage.
After air-drying completely, place the seeds in paper envelopes or small paper bags. Avoid plastic bags at this stage as they can trap moisture. Label each packet with the pumpkin variety and the date the seeds were saved. Store these packets in a cool, dark, dry location like a drawer, cupboard, or a dedicated seed storage box. For even better long-term viability, place the paper envelopes inside a sealed container (like a plastic box) and store it in the refrigerator. Poking a few small holes in the container lid can help prevent condensation buildup while still providing a stable, cool environment. Properly stored pumpkin seeds can remain viable for planting for several years, often up to four years under optimal cool and dry conditions.
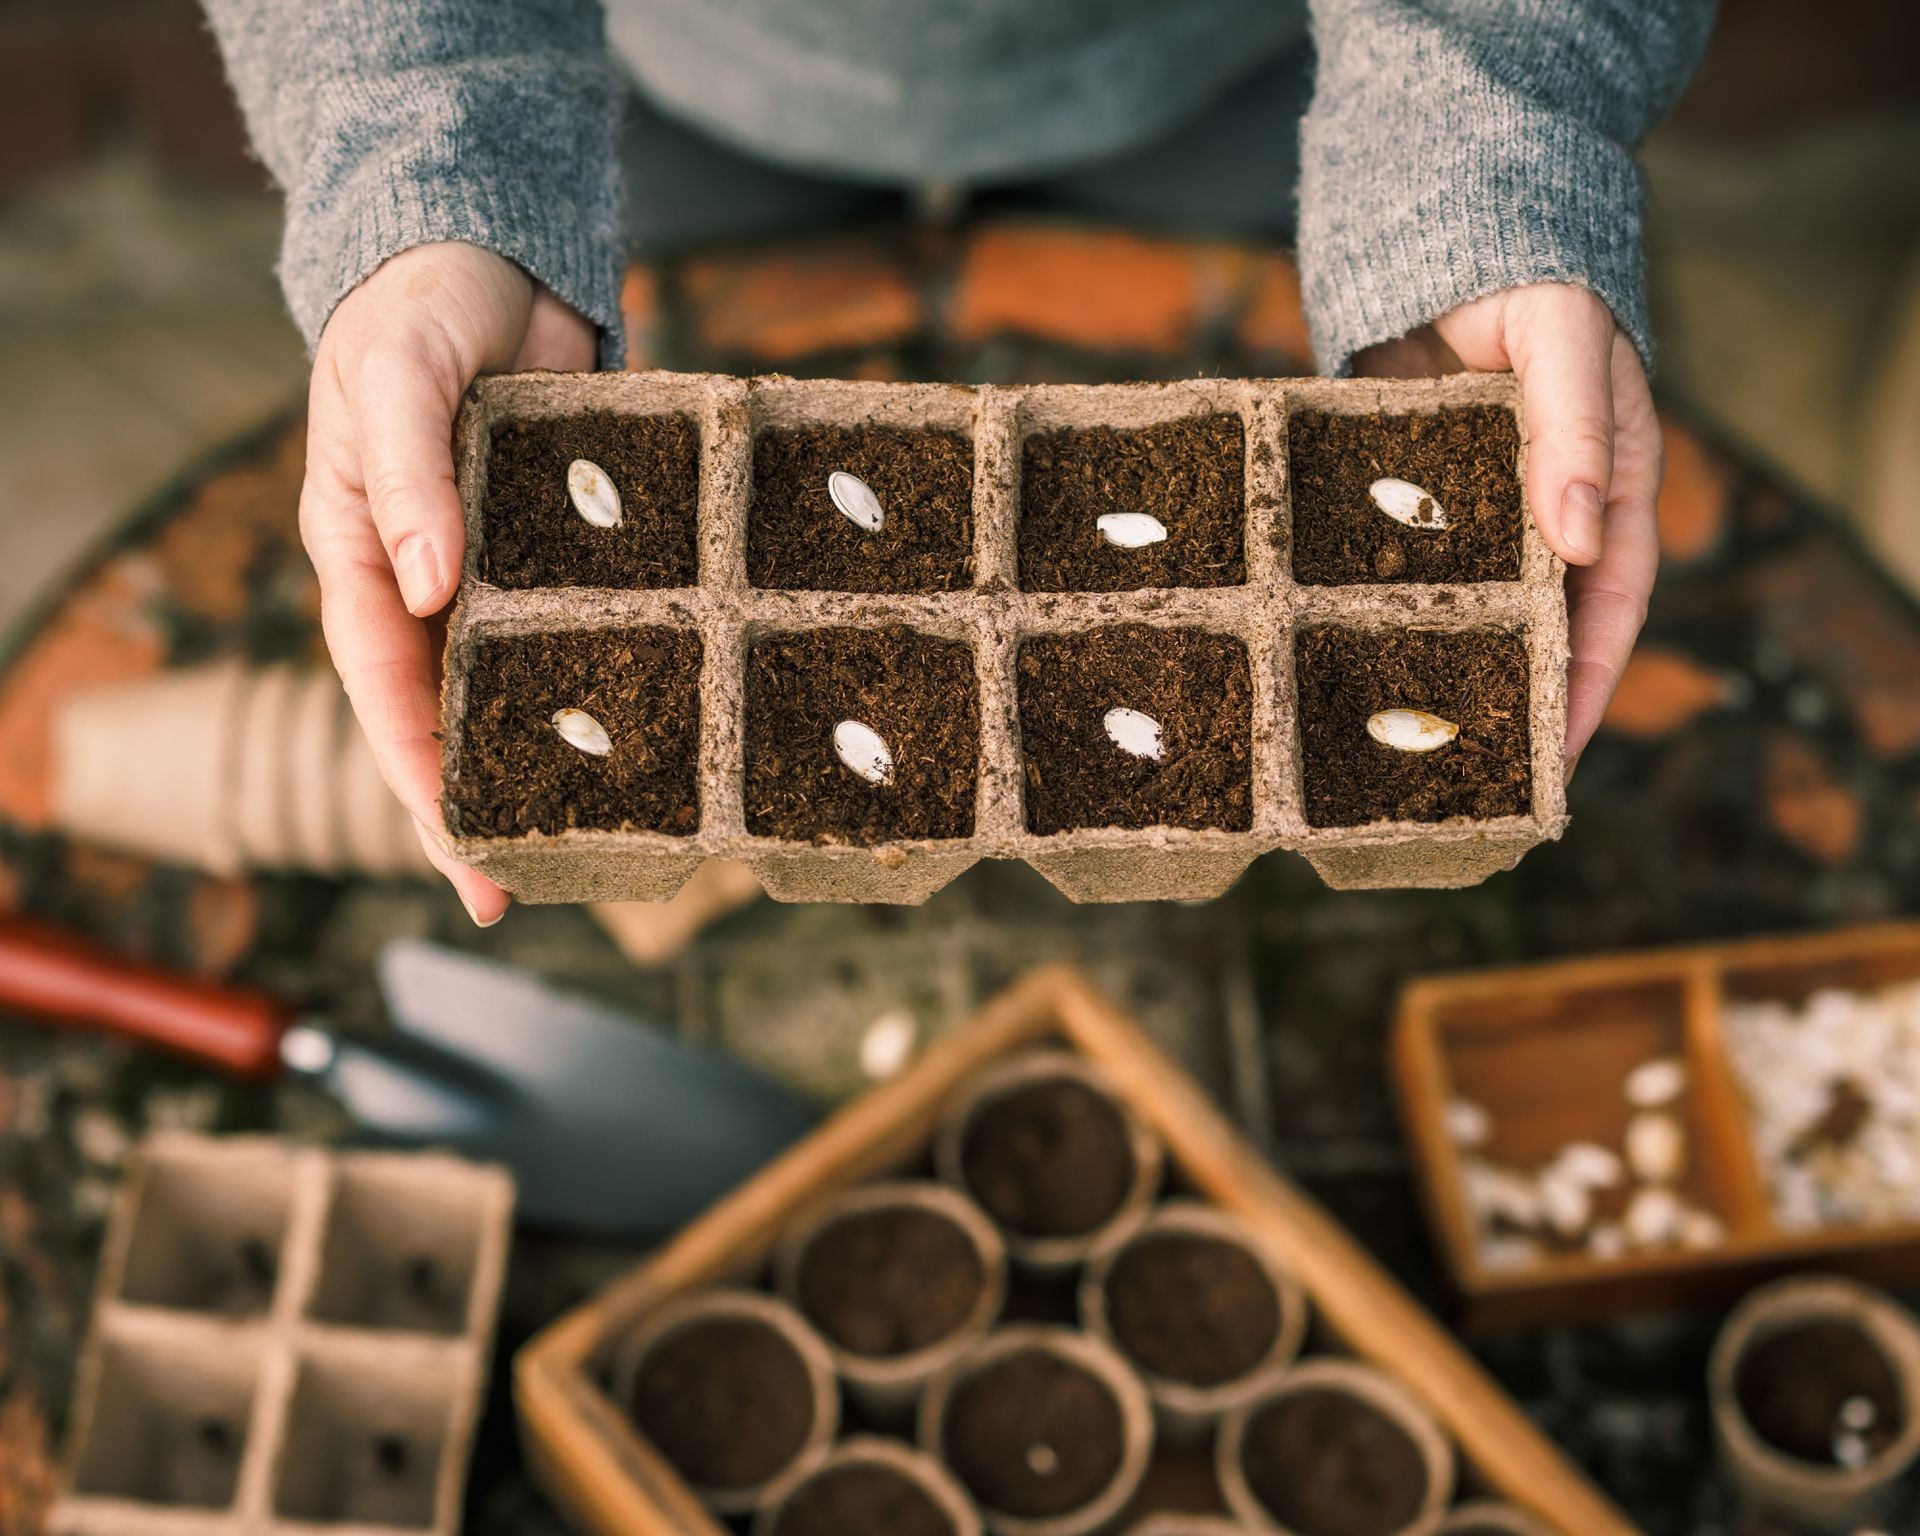 Woman planting pumpkin seeds in a seed starting tray indoors
Storing Dried or Roasted Seeds for Eating
Dried or roasted pumpkin seeds intended for consumption should be stored to keep them fresh and prevent spoilage.
Once cooled completely after drying or roasting, transfer the seeds to an airtight container. This prevents them from absorbing moisture or odors from the environment and keeps them crisp. Stored in an airtight container at room temperature, roasted pumpkin seeds will last for a week or two. For longer storage, keeping the airtight container in the refrigerator or even the freezer can extend their shelf life significantly.
From Seed to Snack: Delicious Preparation Methods
With your seeds cleaned and dried, especially those intended for eating, the final step is transforming them into a tasty treat. Roasting is a popular and simple method with several variations.
Roasting Pumpkin Seeds to Perfection
You can roast pumpkin seeds in a conventional oven or even a microwave. Boiling them first is another option that can influence texture.
- Oven Roasting: After drying, toss the seeds with a little oil (like olive or vegetable oil) and salt. This is the basic preparation. You can then add your favorite seasonings, such as garlic powder, onion powder, paprika, chili powder, cinnamon, or sugar for a sweet variation. Spread the seasoned seeds in a single layer on a baking sheet. Roast in a preheated oven at a relatively low temperature, around 250°F (121°C), for 10-15 minutes. Keep a close watch on them, stirring occasionally, as they can go from perfectly toasted to burnt quickly.
- Microwave Roasting: If you’re in a hurry, the microwave is an option. Pat the dried seeds very dry first. Melt about two tablespoons of butter in a microwave-safe dish and spread the seeds in a single layer in the melted butter. Microwave on high power for 7-8 minutes, stirring the seeds every two minutes to ensure even cooking. Carefully remove and season immediately with salt and other desired flavors.
- Boil Then Roast: For a slightly different texture, or if you boiled them for de-hulling, you can boil the seeds in salted water for about 30 minutes. Drain them thoroughly and pat them dry. Then, spread them in a shallow pan or on a cookie sheet and roast in a preheated oven at a slightly higher temperature, around 300°F (149°C), for 30-40 minutes. Stir the seeds every 10 minutes during roasting.
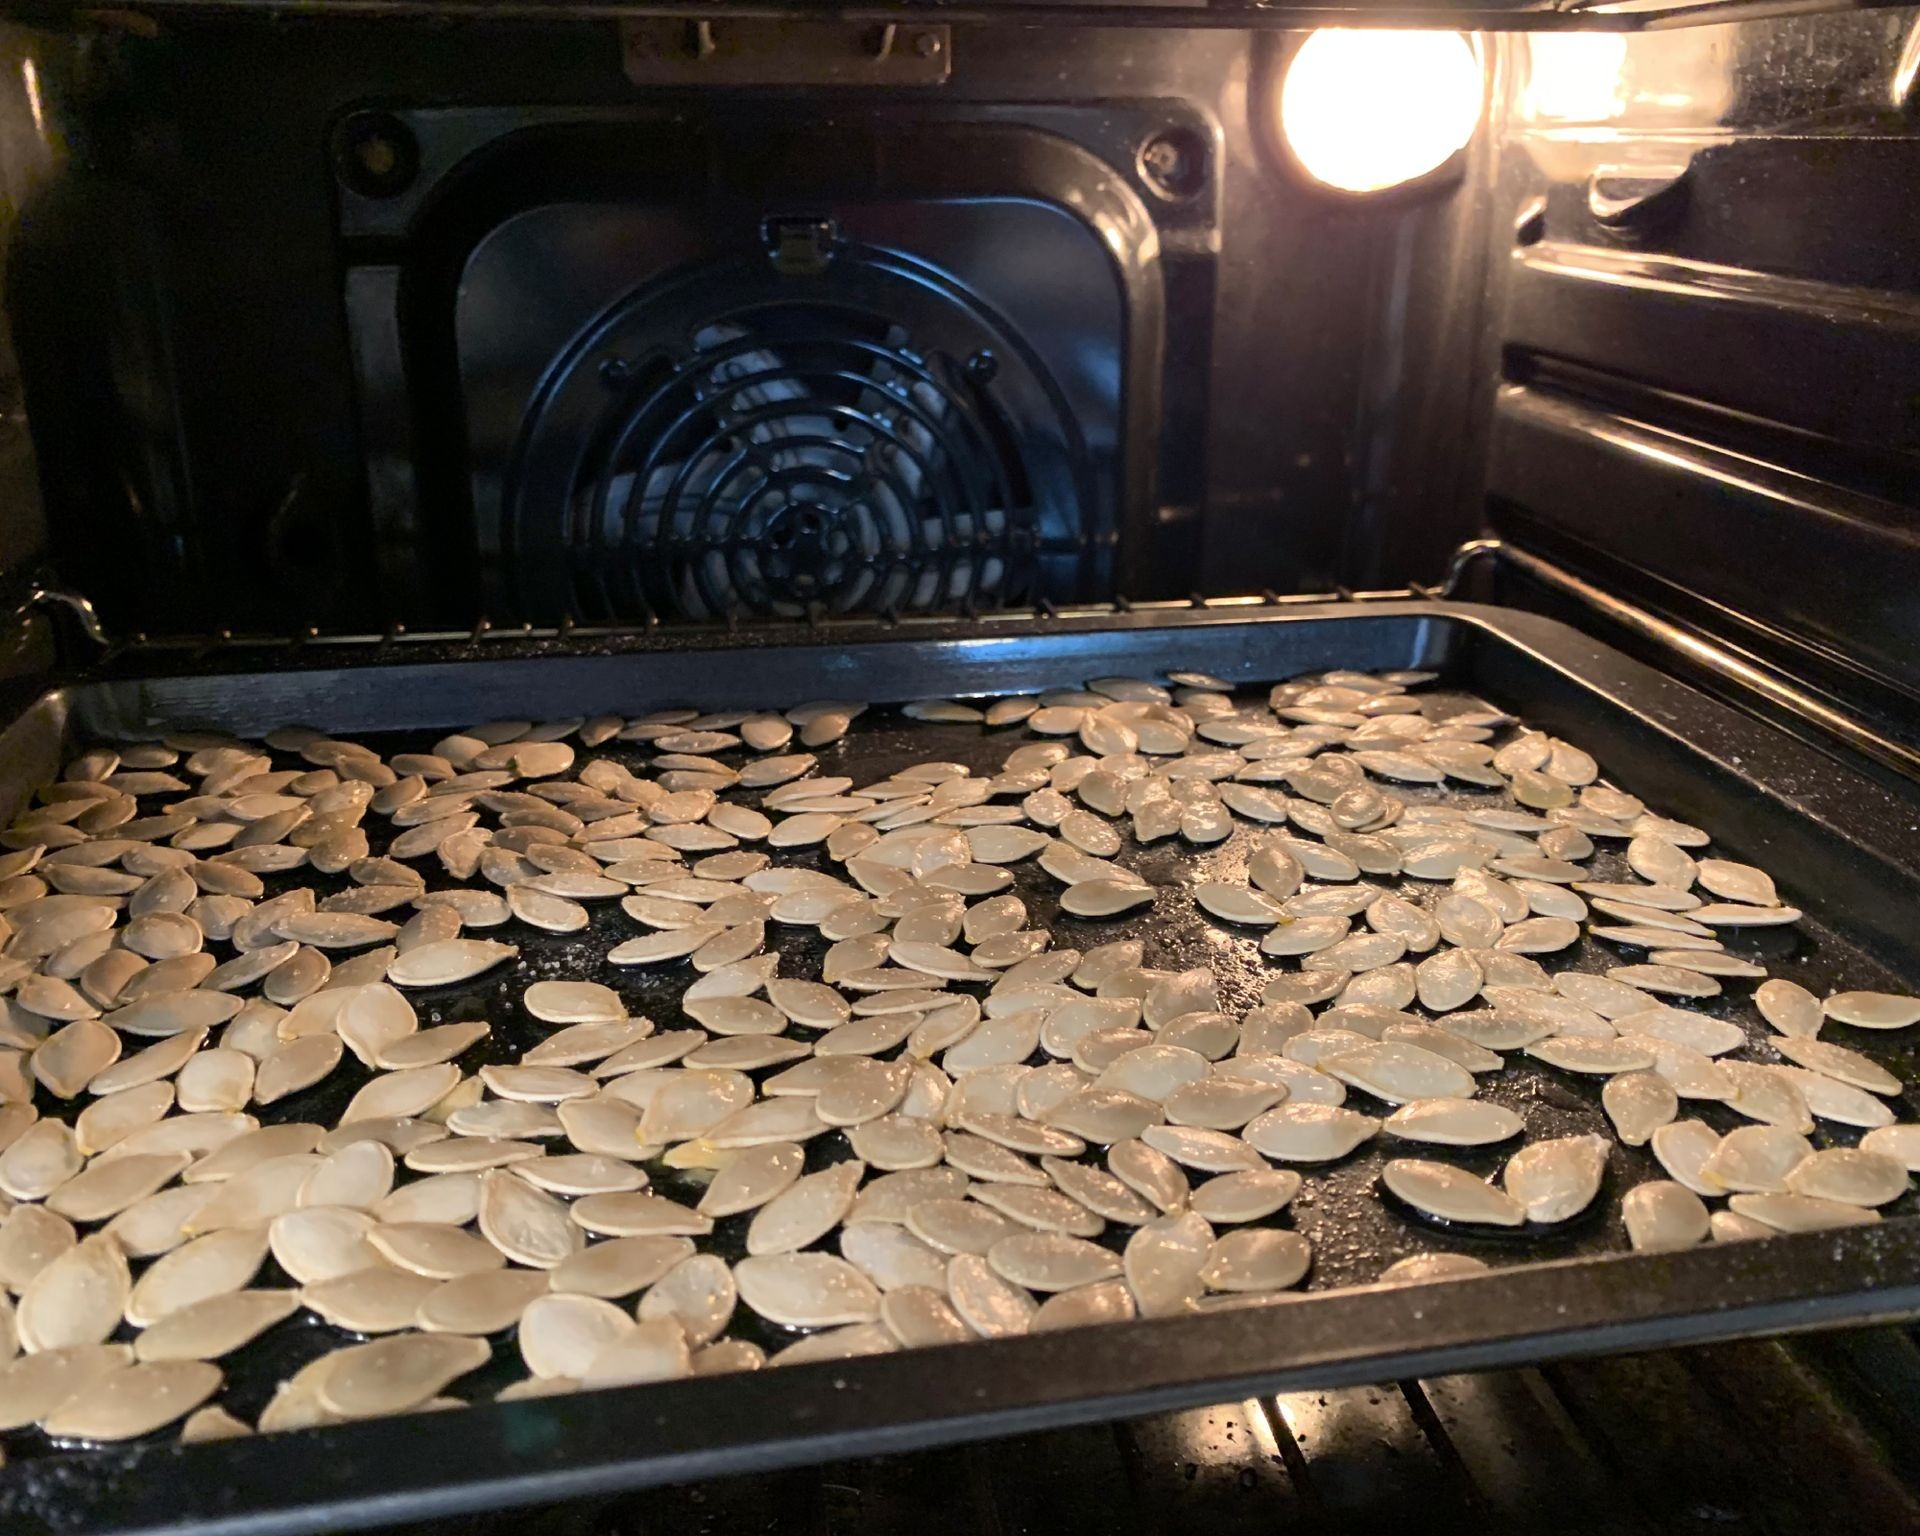 Pumpkin seeds roasting on a baking sheet in an oven
If you are working with hull-less seeds (pepitas), you might choose to toast them in a skillet on the stovetop instead of roasting. Heat a dry skillet over medium-low heat and add the pepitas. Cook, stirring constantly, until they start to pop and release a nutty aroma. This method creates a wonderfully crunchy texture perfect for topping dishes.
Once your roasted or toasted seeds are cool, store them properly in an airtight container to maintain their freshness and crunch.
Common Questions About Saving Pumpkin Seeds
Gardeners and home cooks often have similar questions when they first start saving pumpkin seeds. Here are answers to some frequently asked ones.
How long do saved pumpkin seeds last?
Under optimal storage conditions – cool, dry, and dark – properly dried pumpkin seeds can remain viable for planting for several years. Storing them in a refrigerator significantly extends their lifespan, potentially keeping them viable for up to four years. Roasted or dried seeds stored for eating should be consumed relatively quickly for best quality, lasting a few weeks at room temperature or longer in the fridge or freezer.
Can you plant pumpkin seeds straight from the pumpkin?
While technically a fresh, undried seed could potentially sprout, planting them directly from a fresh pumpkin is not recommended or practical in most climates. Pumpkins mature in the fall, but planting for the next season typically happens in the spring. Seeds need to be dried for long-term storage to prevent mold and spoilage. Attempting to store undried seeds for months would almost certainly result in them rotting before planting time. Proper drying is essential for successful seed saving.
Conclusion
Saving pumpkin seeds is a simple yet rewarding practice that connects you more deeply with your food and garden cycle. Whether you’re preserving genetics for next year’s harvest or preparing a healthy, homemade snack, the process of harvesting, cleaning, drying, and storing these versatile seeds is well worth the effort. By following these steps, you ensure that none of the pumpkin’s potential goes to waste. Embrace the abundance of the season and prepare for future growth and delicious moments right from your own kitchen. Biogarden.Asia is here to support your gardening and sustainable living journey every step of the way.