


No products in the cart.
NEWS
Mastering the Art of Growing Potatoes: A Comprehensive Guide for Home Gardeners
Welcome, fellow garden enthusiasts! Potatoes (Solanum tuberosum) are truly one of nature’s most rewarding and versatile crops. Imagine digging into the soil and unearthing a bounty of fresh tubers, ready to become anything from fluffy mashed potatoes to crispy roasted delights. Growing potatoes at home is a fulfilling endeavor, open to gardeners across a wide range of climates, specifically USDA zones 3-10b. With thousands of captivating varieties available, offering a spectrum of colors, shapes, and sizes, there’s a perfect potato for every palate and every garden. If you’re ready to add this staple crop to your patch, this detailed guide covers everything you need to know for a successful potato harvest.
Essential Potato Plant Care
Potatoes are classic cool-season crops that flourish when given the right conditions. As a globally important food source, their cultivation relies on precise attention to light, water, temperature, soil, and nutrients, along with proactive management of potential pests and diseases. Providing optimal care from planting to harvest is key to cultivating healthy, abundant potato plants.
Light Requirements
Potatoes are avid sun-worshippers and perform best when planted in a location that receives full sun – typically six to eight hours of direct sunlight daily. However, experienced gardeners in particularly hot climates know that intense afternoon sun can sometimes be too much, potentially leading to scorched leaves. Conversely, insufficient sunlight results in weak, spindly plants that put less energy into tuber development underground. Choosing a spot with ample morning sun and perhaps some afternoon shade in scorching regions can be beneficial.
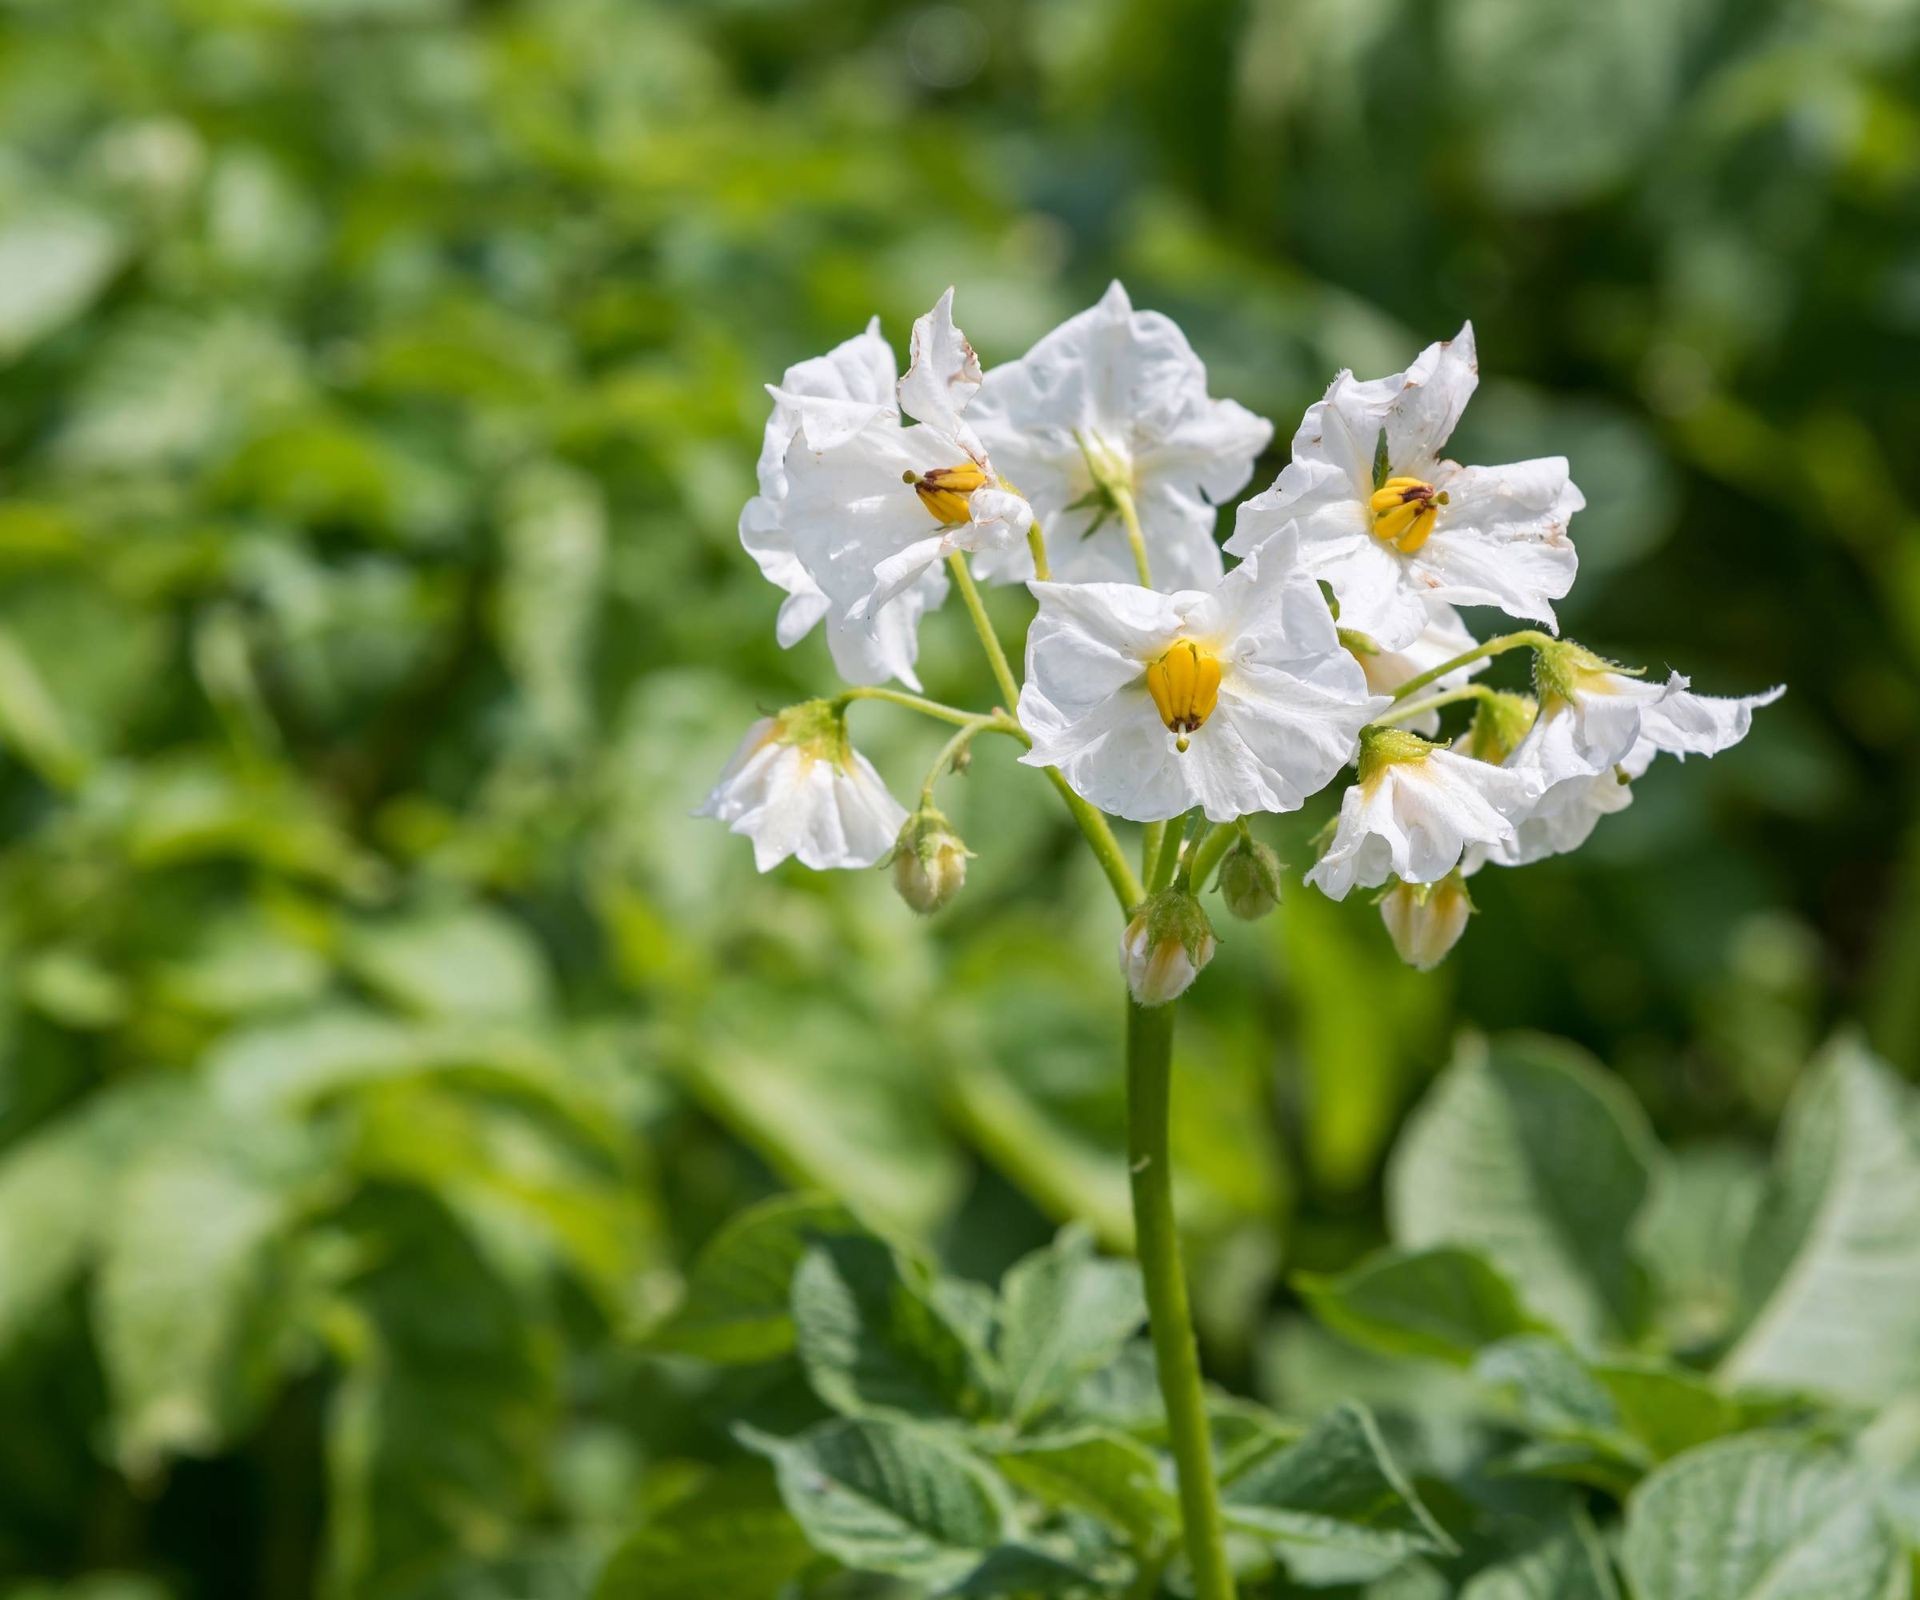 Cluster of small, white flower blooms signaling healthy potato plants
Watering Needs
Consistent moisture is vital for potato growth, but it’s a delicate balance. Potato plants thrive in soil that is kept evenly moist, but never waterlogged. Excessive moisture is a prime culprit for promoting various types of rot diseases, which can quickly decimate a crop. The goal is moist, not soggy. Depending on your local weather patterns and soil type, potato plants generally require about an inch (2.5 cm) of water per week, either from rainfall or supplemental irrigation. Pay close attention during flowering and tuber set, as this is a critical period for consistent hydration to ensure good tuber development.
Temperature and Humidity
As a cool-season crop, potatoes are happiest when daytime temperatures range between 65-80°F (18-27°C) and nighttime temperatures drop to a cooler 55-65°F (13-18°C). These cooler nights are particularly important for the plant to channel energy into forming tubers rather than excessive foliage growth. While potato plants can tolerate brief periods of higher humidity, it’s not a strict requirement. A relative humidity range of 60-80% is generally conducive to healthy plant growth, but good airflow is more important for preventing fungal issues.
Soil Preferences
The right soil is paramount for healthy tuber development. Potatoes perform best in well-draining, sandy or loamy soil that is slightly acidic, with a preferred pH range of 6.0 to 6.5. Heavy clay soils that retain too much water can lead to smaller tubers and increased disease risk. Improving soil structure with organic matter helps ensure proper drainage and aeration, providing the perfect environment for roots and tubers to expand.
Fertilization
Potatoes have a relatively shallow root system compared to some other crops, meaning they benefit from consistent nutrient availability in the upper soil layers. Starting your potato patch off right is crucial. Incorporating well-aged compost or other organic matter into the planting bed provides a slow-release source of nutrients and improves soil structure. For a more targeted approach, especially in soils lacking fertility, a balanced fertilizer can be applied. A soil test is the most accurate way to determine your specific nutrient needs. Without a soil test, a general recommendation often involves applying a balanced fertilizer (like a 10-10-10 blend) before planting. Follow up with side dressings of fertilizer as the plants grow to support vigorous foliage and tuber development. Based on years of experience at Biogarden.Asia, providing nutrients at key growth stages makes a significant difference in yield.
Addressing Problems: Pests, Diseases, and Disorders
While sturdy, potato plants can sometimes encounter challenges from pests, diseases, and environmental disorders. Growing strong, healthy plants through proper care is the first line of defense, as vigorous plants are less susceptible.
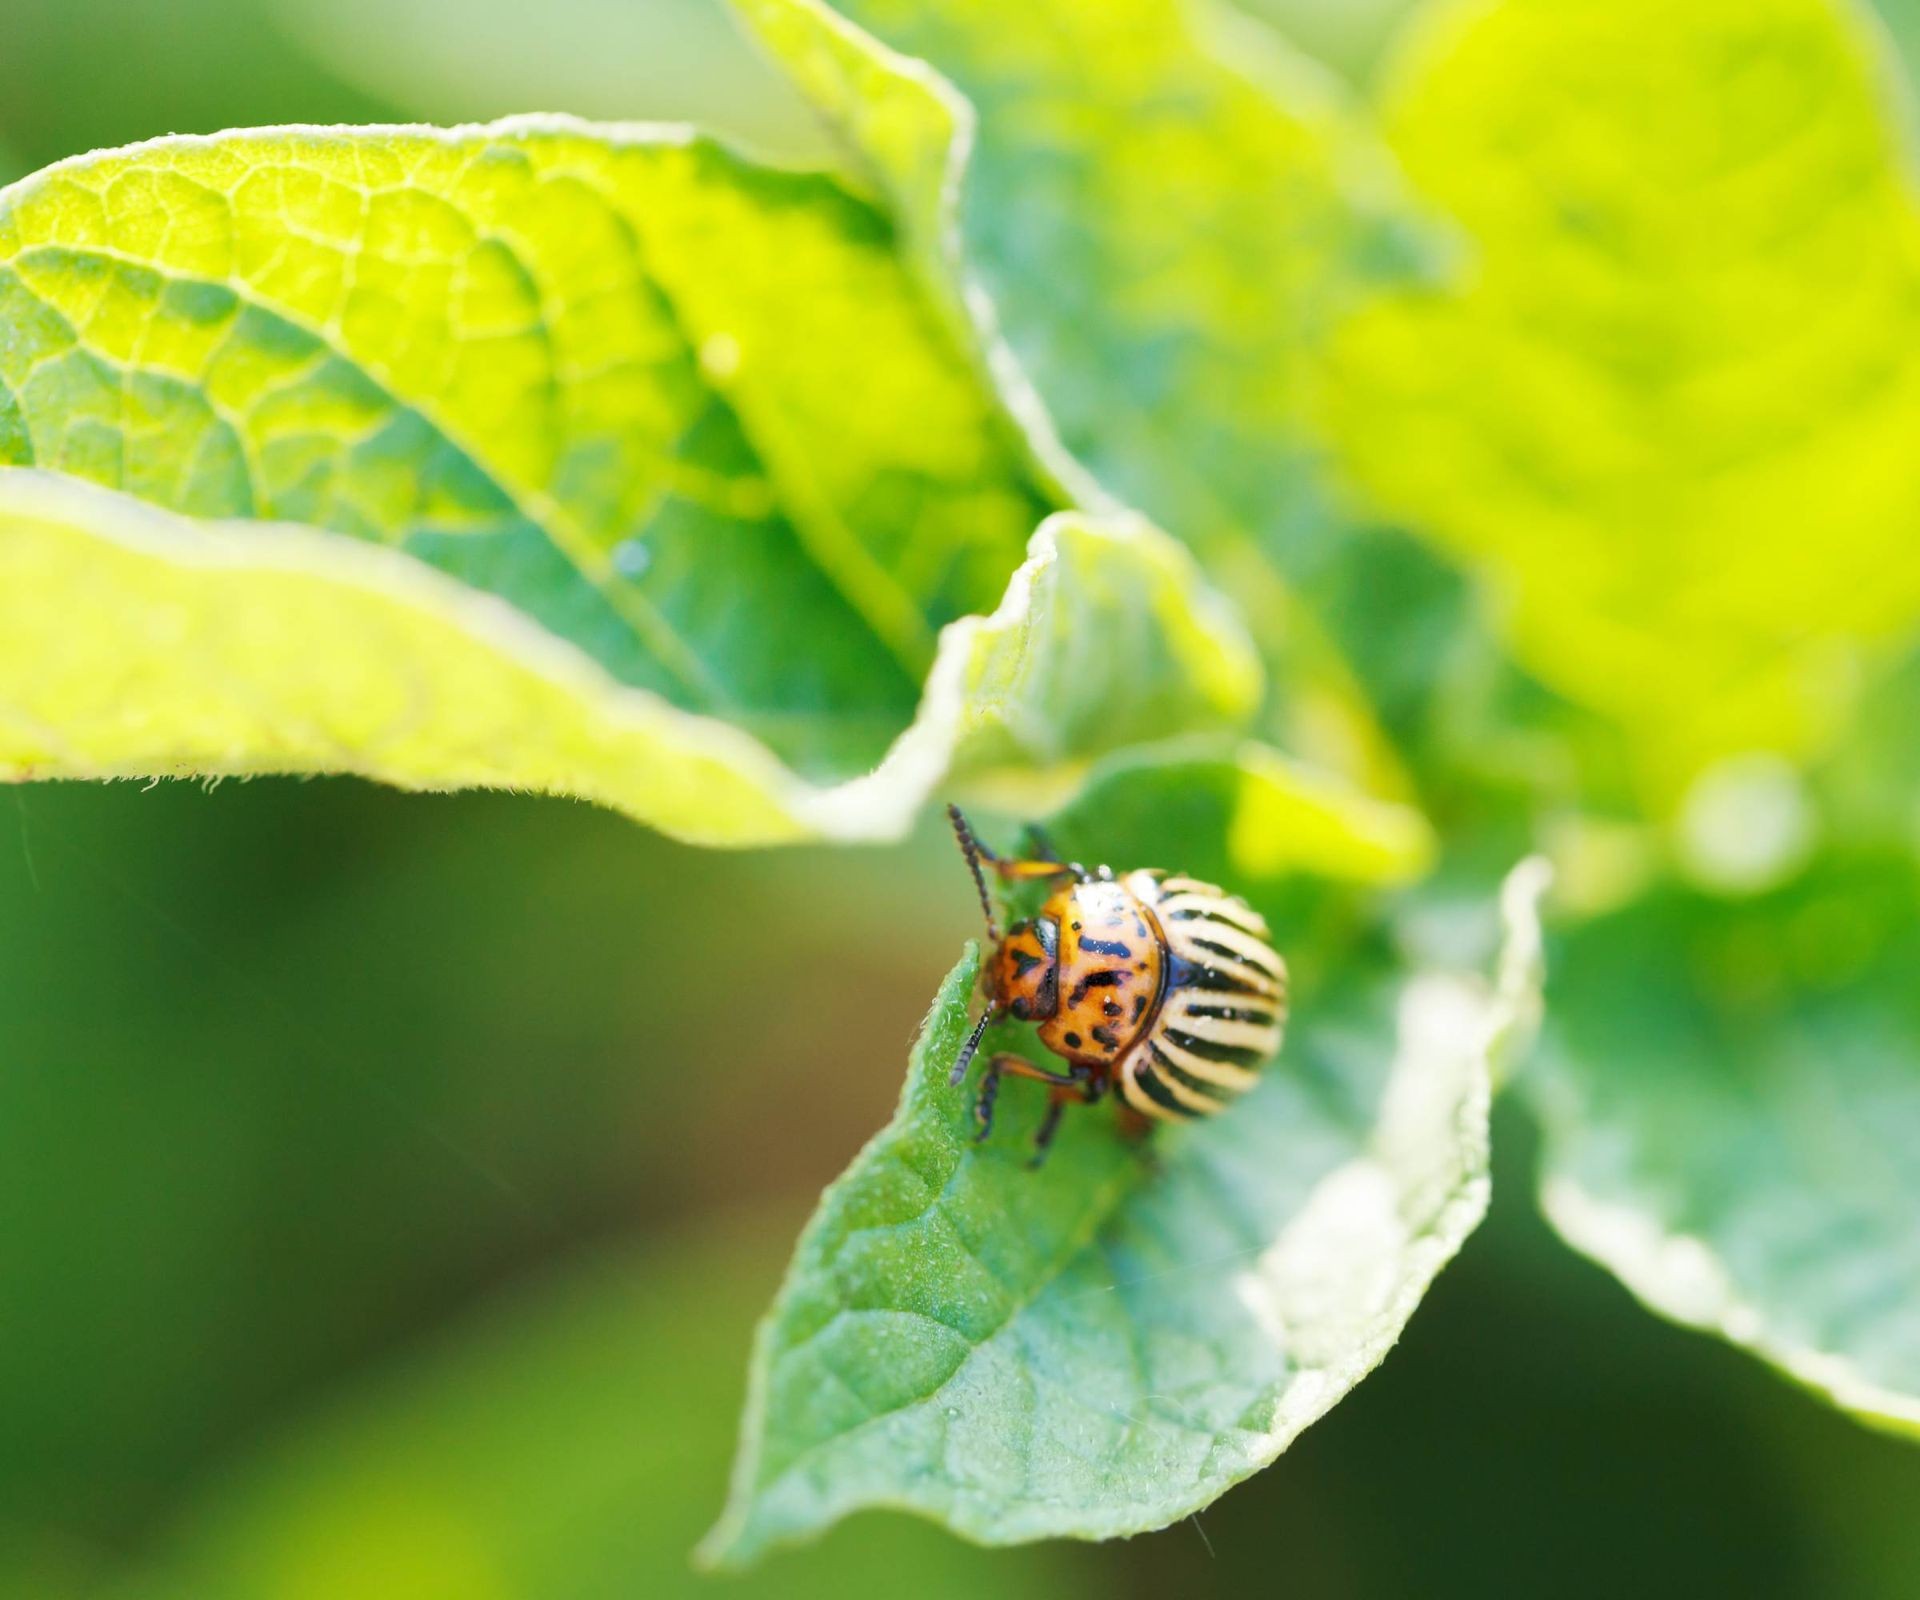 Small, striped Colorado potato beetle on a potato leaf
Various pests can target potato foliage and tubers. Common culprits include aphids (sucking sap, transmitting viruses), Colorado potato beetles (defoliating leaves), and flea beetles (creating small holes in leaves). Monitoring your plants regularly can help you spot these issues early and take appropriate action.
Fungal diseases are also a concern, notably early blight and late blight, which manifest as spots on leaves and stems and can quickly spread in humid conditions. Bacterial soft rot can affect tubers. Preventing these diseases is often easier than treating them. Strategies include selecting disease-resistant seed potato varieties, practicing crop rotation, ensuring good air circulation, and avoiding overhead watering which keeps leaves wet. Maintaining proper soil fertility also helps plants resist disease.
Environmental disorders can affect tuber appearance and quality. Tuber greening occurs when developing tubers are exposed to sunlight, turning parts of the skin and flesh green due to the formation of solanine, a toxic compound. This emphasizes the critical importance of hilling (covering tubers with soil). Irregularly shaped or cracked tubers, known as “growth cracks,” are often a result of inconsistent watering – periods of dryness followed by sudden heavy watering. Consistent moisture helps prevent this.
Planting Potatoes for Success
Getting your potato plants off to a good start involves timing and technique. Seed potatoes, which are simply small tubers or pieces of tubers with “eyes” (sprouts), are used for planting. It’s crucial to use certified disease-free seed potatoes from a reputable source rather than grocery store potatoes, which may carry diseases.
The soil temperature is a critical factor for planting. Wait until the soil has warmed consistently to at least 55°F (13°C) during the day and doesn’t drop below 45°F (7°C) at night. Planting too early in cold, wet soil can delay sprouting and cause the seed pieces to rot before they even begin to grow. If planting larger seed potatoes, cut them into pieces, ensuring each piece has at least one or two healthy eyes. Allowing these cut pieces to “cure” or dry for a day or two before planting helps prevent rot.
Prepare your planting bed by loosening the soil and incorporating compost. Dig trenches about 4 inches (10 cm) deep. Place seed potato pieces cut-side down (if applicable) or whole small tubers in the trench, spacing them about 10-12 inches (25-30 cm) apart. Rows should be spaced 30-36 inches (76-91 cm) apart to allow for hilling and airflow. Smaller fingerling varieties can be planted a bit closer, around 8 inches (20 cm) apart. Cover the seed potatoes with a few inches of soil.
One of the most critical steps in growing potatoes is hilling. As the potato plants grow and their shoots emerge from the soil, you need to add more soil, compost, or organic mulch around the base of the plant, covering the lower part of the stem. This encourages more tubers to form along the buried stem and, crucially, keeps developing tubers covered to prevent greening. Repeat this process as the plants grow taller, adding another 2-4 inches (5-10 cm) of material each time, until the plants are quite large.
Mulching around the plants after hilling with materials like straw or wood chips helps retain soil moisture, suppress weeds, and further blocks sunlight from reaching any exposed tubers. Keep a watchful eye on the hills and add more material if tubers start to become exposed.
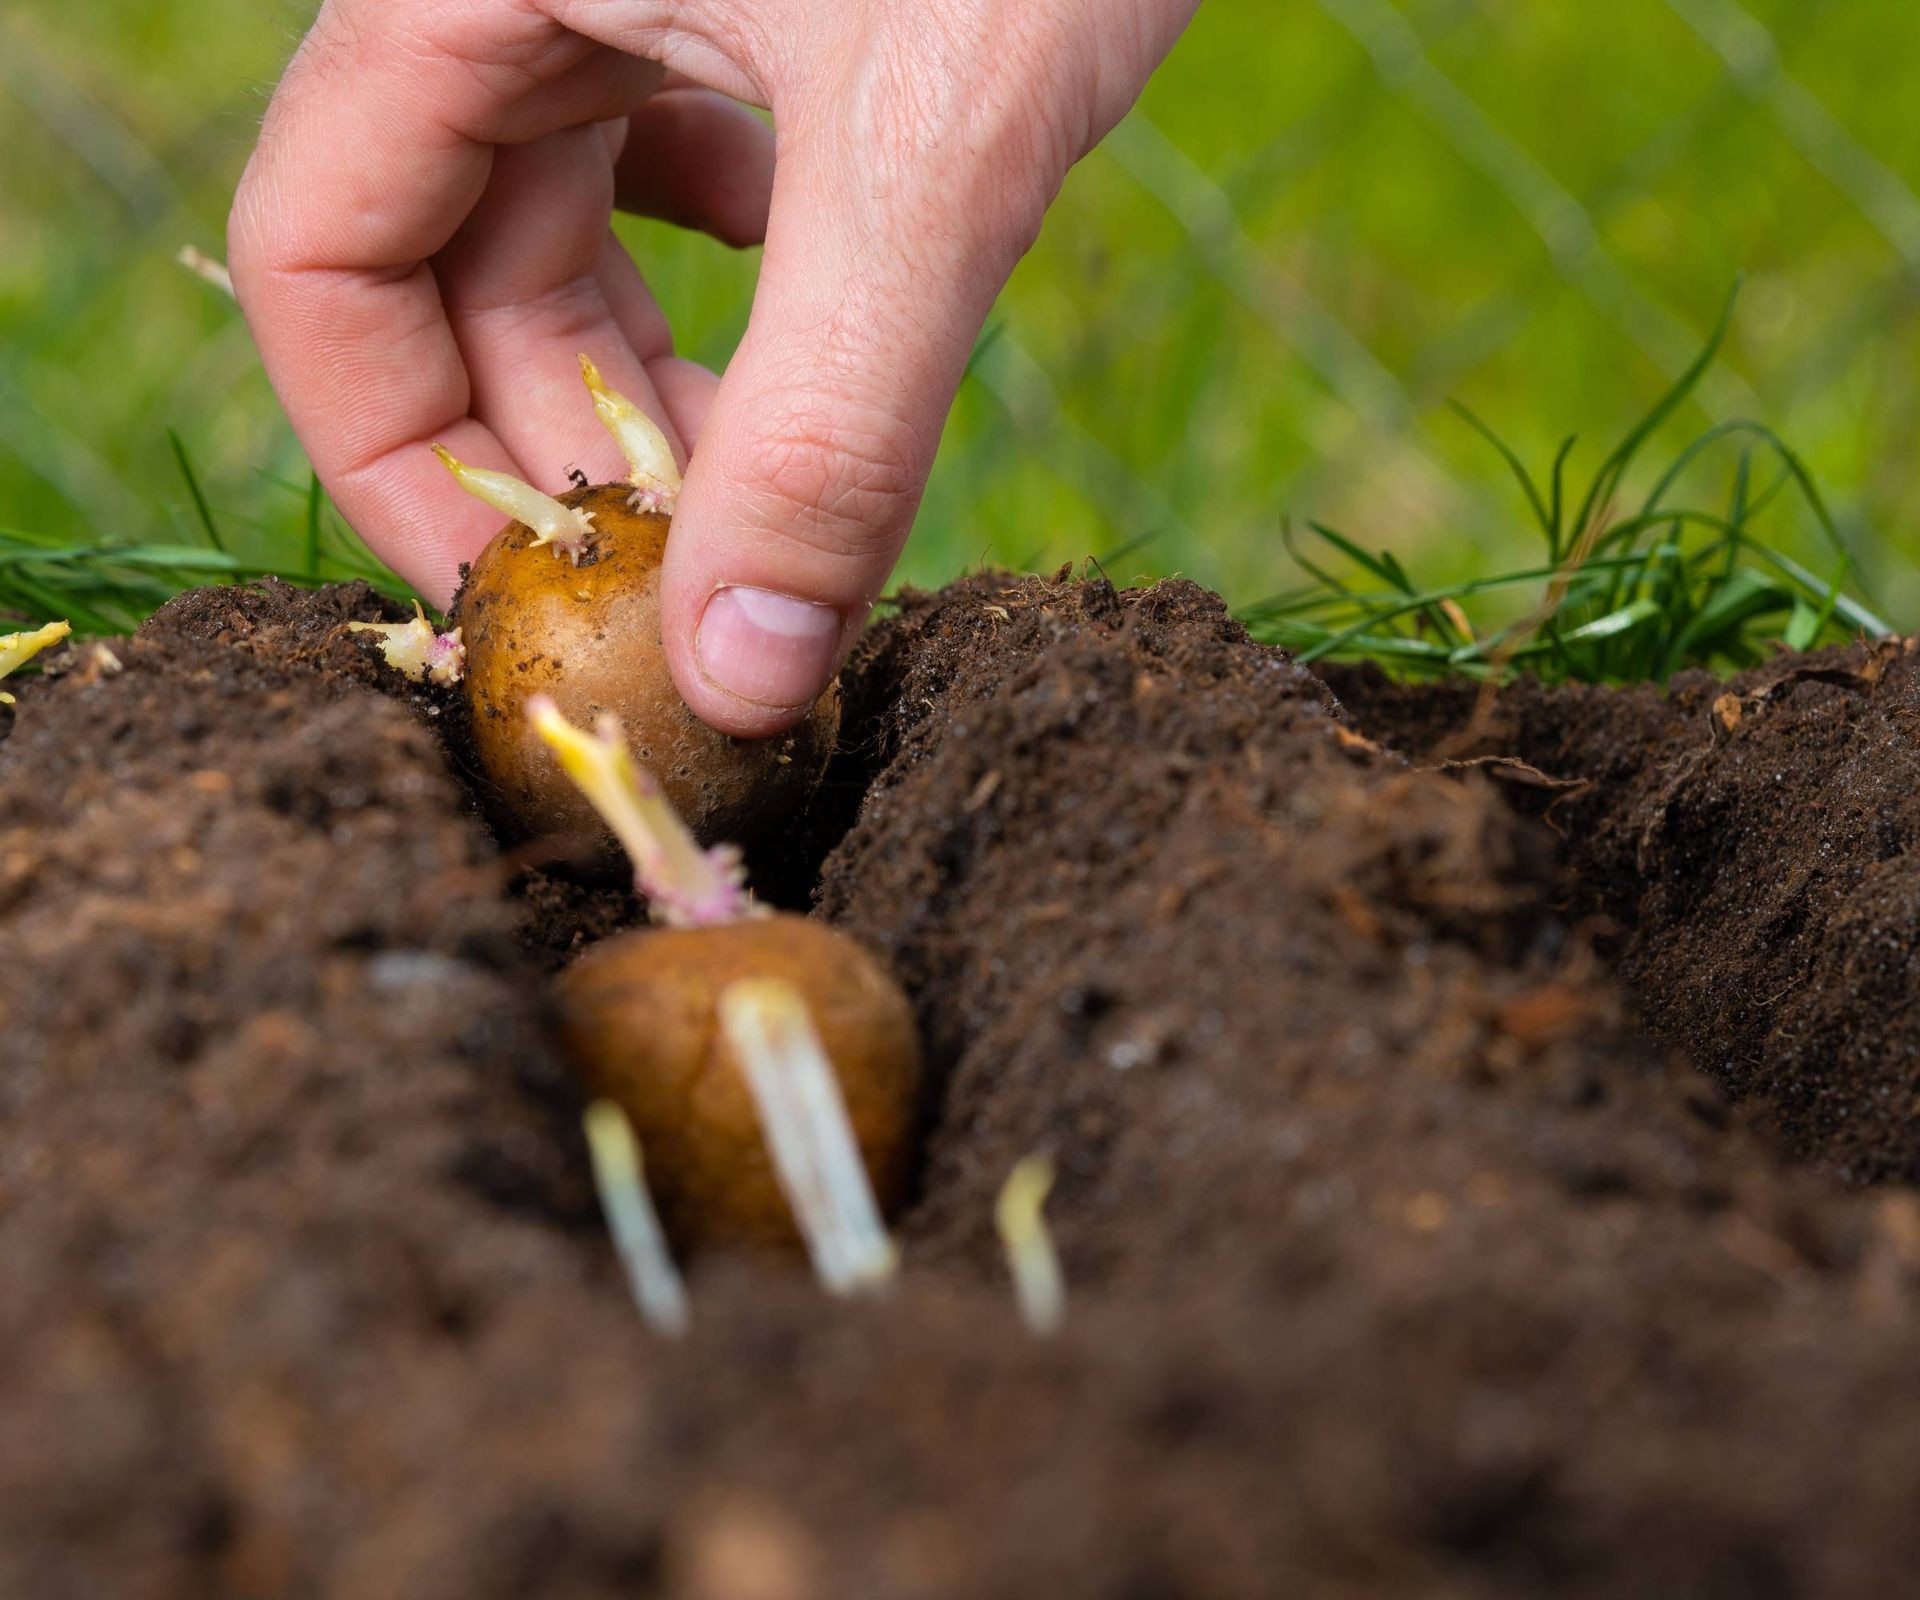 A hand carefully plants a seed potato into a prepared trench
Growing Potatoes in Containers
Don’t have much garden space? No problem! Potatoes adapt very well to container growing. Almost any large container with drainage holes will work – a spacious pot, a bucket, or specialized potato grow bags. Use about 2-3 seed potatoes per 5-gallon (19 liter) sized container. Plant them as you would in the ground, burying them initially and then adding more growing medium or compost as the plant grows, following the hilling principle. Container-grown potatoes may require more frequent watering, as containers dry out faster than garden beds.
Harvesting Your Potato Bounty
Knowing when and how to harvest ensures the best quality potatoes. The timing depends on the variety you planted and when you want to use them. “Early” or “new” potatoes are typically smaller and can be harvested relatively soon after flowering, usually around 10-12 weeks after planting. These are delicious cooked immediately with their skins on.
For larger, mature tubers suitable for storage, wait until the potato vines naturally begin to yellow, wither, and die back. This process indicates that the plant has finished growing and the tubers are fully formed and their skins are hardening. Once the vines have died back significantly, you can begin harvesting. Use a garden fork, inserting it gently into the soil several inches away from the base of the plant to avoid piercing the tubers. Carefully lift the plant and soil, revealing the hidden potatoes. You can also gently rummage through the soil by hand.
Potatoes intended for long-term storage require a crucial step called curing. After digging, brush off excess dirt (do not wash them). Lay the tubers out in a single layer in a warm (around 50-60°F or 10-15°C), dark, well-ventilated location for about 10 days to two weeks. This allows the skins to toughen and any minor scrapes to heal, improving storage life and reducing disease risk.
Once cured, move the potatoes to their final storage location. The ideal spot is cool (32-40°F or 0-4°C), dark, and has high humidity (around 95%). A root cellar, cool basement, or unheated garage can work. Potatoes for frying store better at a slightly warmer temperature of 40-50°F (4-10°C) as colder temperatures can convert starches to sugars, affecting frying quality. Always store potatoes away from onions, as gases from onions can cause potatoes to sprout faster.
Before using stored potatoes, always inspect them. Remove any sprouts or green areas, as these contain toxins and should not be consumed.
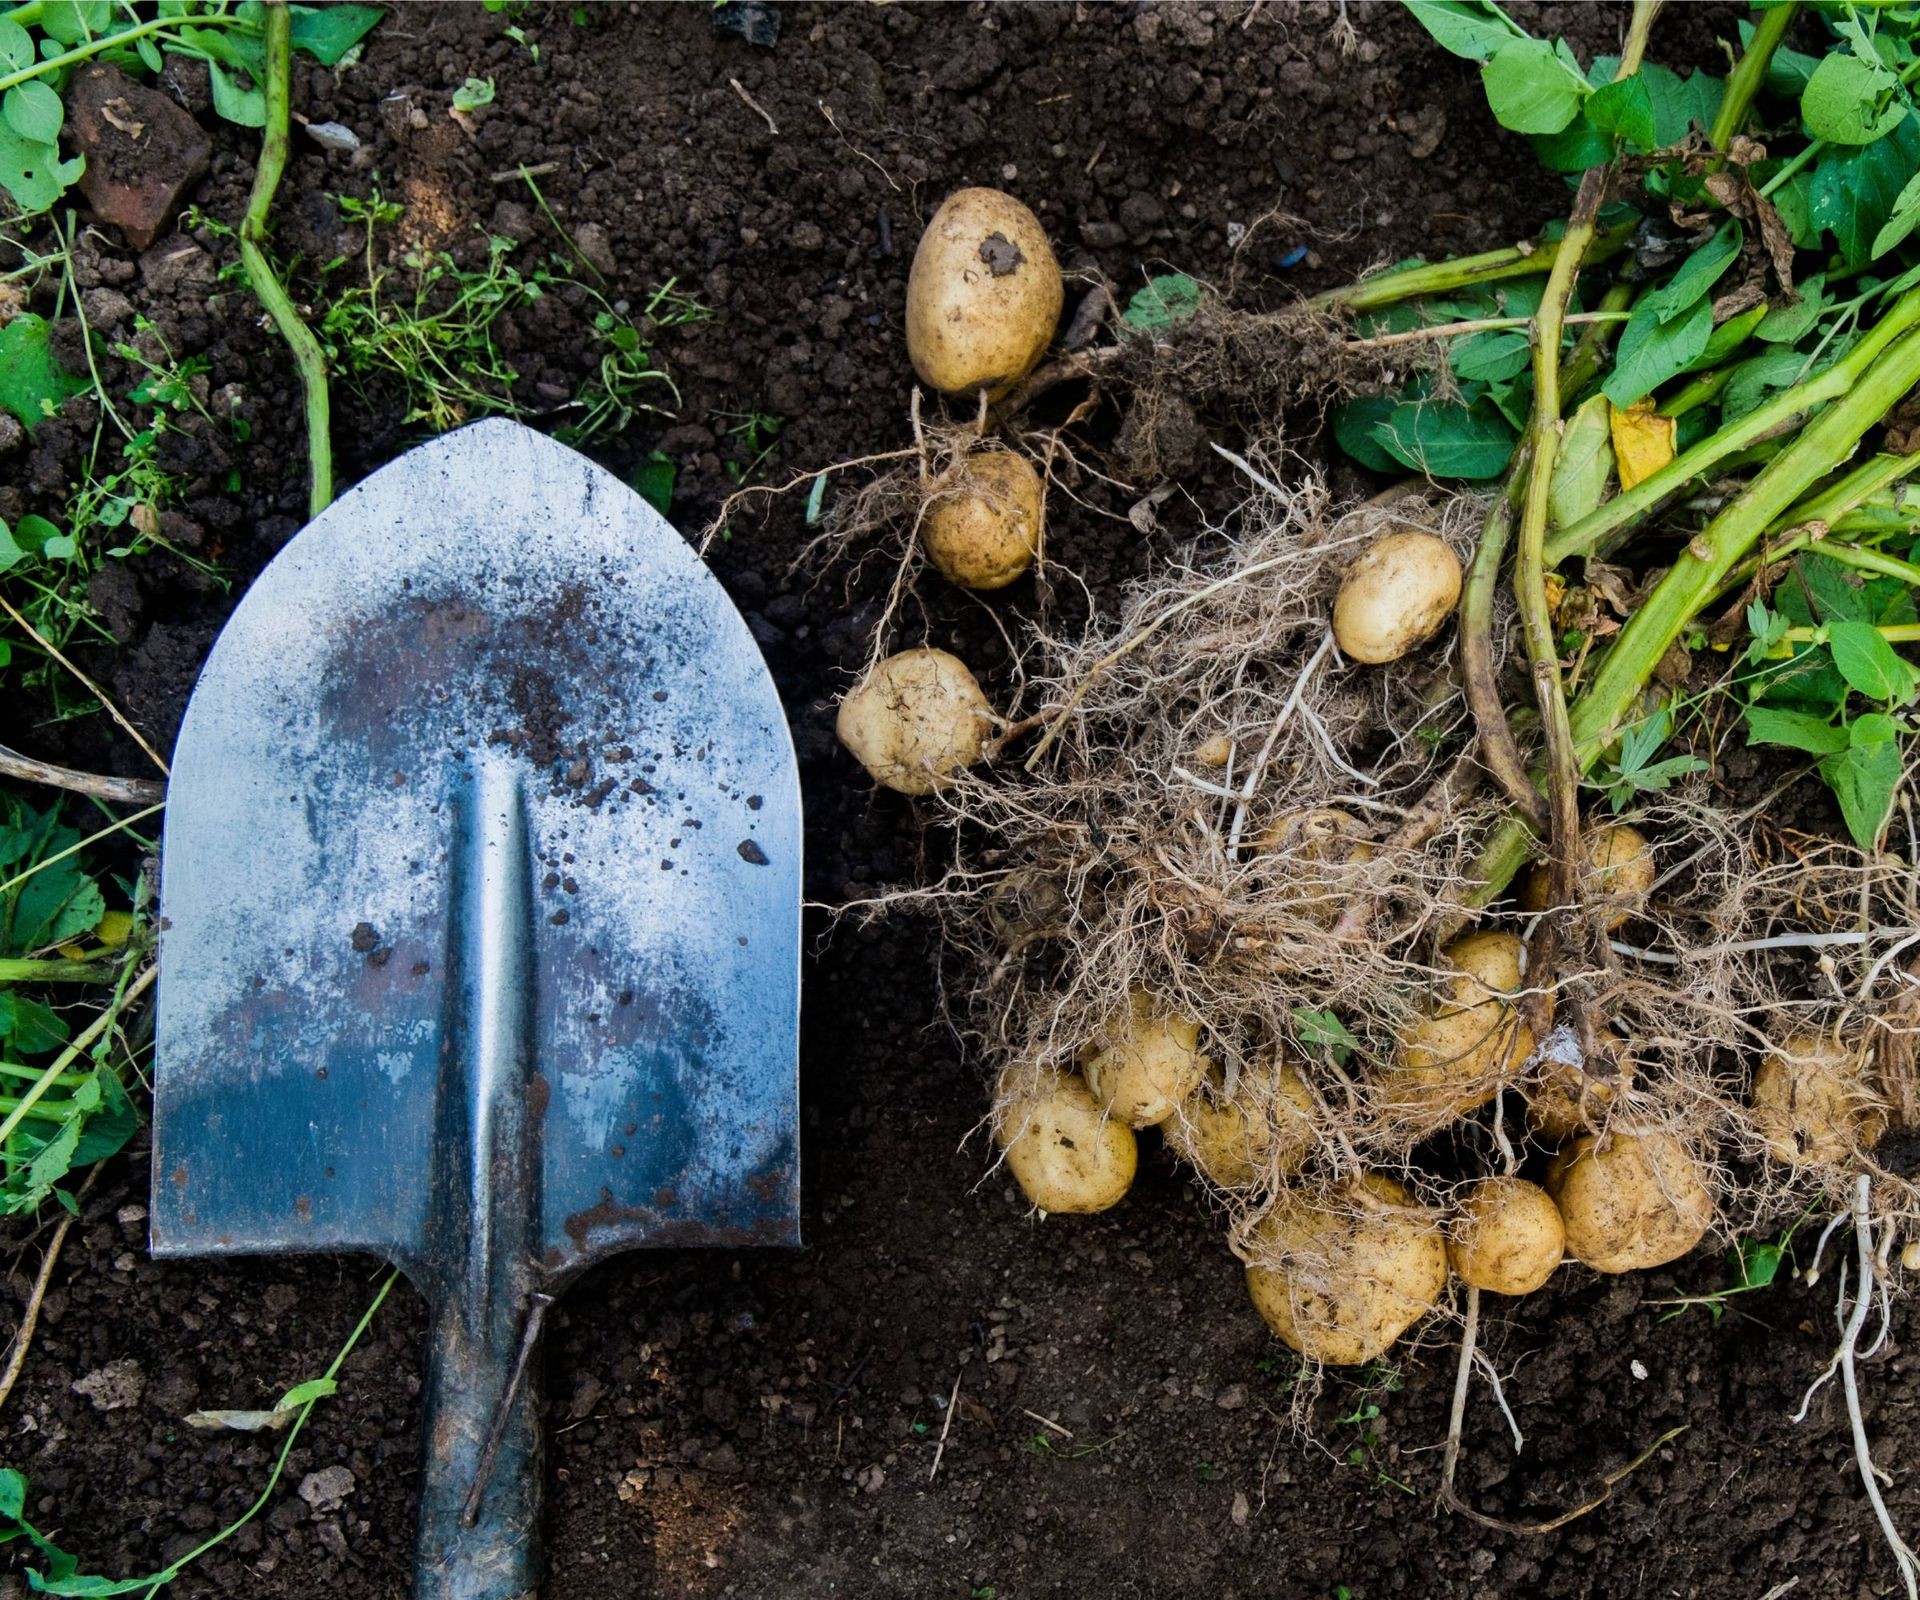 A garden fork rests beside a freshly harvested pile of potatoes
Exploring Potato Varieties
The world of potatoes is incredibly diverse! Beyond the common Russets (ideal for baking and mashing) and buttery Yukon Golds, there are countless fascinating varieties. Explore colorful options like Adirondack Blue or Red Norland, uniquely shaped fingerlings such as Russian Banana or Austrian Crescent, and many more, each with distinct flavors and textures suited for different culinary uses (waxy varieties hold their shape well in salads, starchy ones are best for mashing). Discovering new varieties is part of the adventure of growing your own.
Frequently Asked Questions About Growing Potatoes
How long does it take for potatoes to grow?
The time from planting to harvest varies by variety. Early potato varieties can be ready in as little as 60-80 days (around 10 weeks). Main crop or storage varieties, like large Russets, take longer, typically 90-120 days, sometimes up to 135 days, until the vines die back, signaling maturity.
Can I just plant a regular potato from the grocery store?
While a regular potato might sprout and grow, it’s strongly recommended to use certified seed potatoes. Grocery store potatoes may have been treated to prevent sprouting and, more importantly, can carry diseases that could infect your soil and future crops. Certified seed potatoes are grown specifically for planting and are inspected to be disease-free. When planting, smaller seed potatoes can be planted whole. Larger ones should be cut into pieces, ensuring each piece has at least two “eyes,” and allowed to cure for a couple of days before planting. Remember to hill soil over the emerging shoots to protect the developing tubers from light.
Can you grow a potato from a potato?
Yes, technically you grow potatoes from pieces of a parent potato (seed potatoes). As mentioned above, smaller seed potatoes are planted whole. For larger ones, cut them into pieces about the size of a golf ball, each containing at least one or two healthy buds or “eyes.” Let these cut pieces sit out for a few days to form a protective callus over the cut surface before planting. This curing process helps prevent rot once planted in the soil.
Conclusion
Growing potatoes is a rewarding experience, connecting you directly to the food on your plate. By understanding their basic needs for light, water, nutrients, and proper soil, and by employing key techniques like hilling and mindful harvesting, you can enjoy a bountiful harvest of fresh, delicious tubers right from your own garden. Don’t be discouraged by potential challenges; with proper care and attention, you can overcome them. Ready to start your potato growing journey? Explore the range of organic soil amendments, quality seed potatoes, and expert tools available at Biogarden.Asia to give your plants the best possible start!